We've just released a wonderful new collection of snowflake embroidery designs and this week I'm challenging myself to use these designs to create a cute snowflake patchwork quilt block:
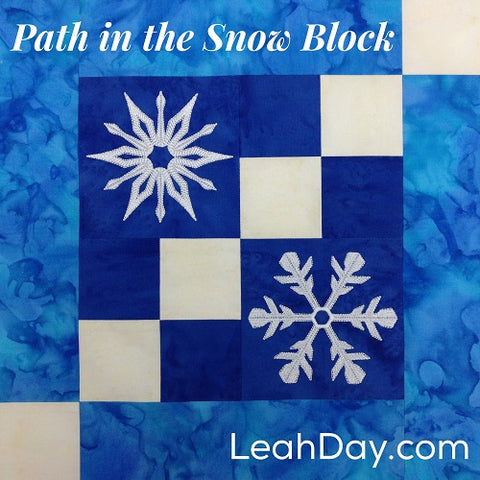
This block is created by first embroidering the snowflakes, then trimming the fabric down accurately to piece with more fabrics to create the Path in the Snow block. Let's learn all the steps of this easy project in this new video:
Path in the Snow Patchwork Quilt Block Pattern
Materials
- 1/4 yard Island Batik Blueberry
- 1/4 yard Island Batik Waterfall
- 1/4 yard Island Batik Cream
- Sensational Snowflakes Embroidery Collection
- Sticky Tear-Away stabilizer
- Medium weight Cut-Away stabilizer
- White Isacord Thread for snowflake embroideries and machine quilting
- White Aurifil 50 wt cotton for piecing
Fabric Cutting
- Cut 2 - 10-inch squares of Island Batik Blueberry
- Cut 4 - 2 1/2-inch squares Island Batik Blueberry
- Cut 6 - 2 1/2-inch squares Island Batik Cream
- Cut 2 - 2 1/2 x 8 1/2-inch strips Island Batik Waterfall
- Cut 2 - 2 1/2 x 10 1/2-inch strips Island Batik Waterfall
 Machine Embroidery Instructions
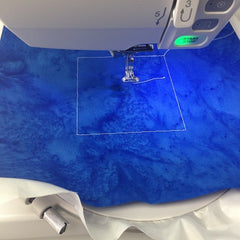
Cut a piece of sticky tear-away stabilizer at least 1 inch bigger than your hoop on all sides. Hoop the stabilizer with the paper side up, then use a pin to score the surface and tear away the paper to reveal the sticky layer underneath.
Place the hoop on your machine and center one 10 inch square of Island Batik Blueberry on top. Float a 5 inch square of medium cut-away stabilizer underneath the hoop. If your machine has the function, run a basting stitch through all layers to hold them securely.
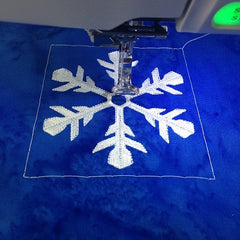 Stitch your favorite snowflake design using Isacord polyester embroidery thread.
Hoop again and stitch another snowflake design using the same method.
Piecing Instructions
Carefully cut away the cut-away stabilizer from the back of the embroidery designs using sharp scissors, being careful not to cut the stitching. Tear away the excess tear-away stabilizer, being careful not to distort the embroidery design.
Give the block a gentle press with a pressing cloth if needed. Center the snowflake embroidery design and trim the fabric down to 4 1/2-inches square.
Arrange the snowflake designs and fabrics according to the diagram below:
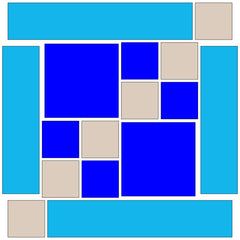
Piece one 2 1/2-inch square of Cream to one 2 1/2-inch square of Blueberry. Press the seam allowances open. Repeat 3 more times. Arrange two pieced units together, matching the seams in the center, and piece together to form a Four Patch Block. Repeat to create a second block and press all seam allowances open. Piece the two units together to create the center of the block.
Next piece the shorter waterfall strips to both sides of the block. Piece the remaining cream 2 1/2-inch squares to the ends of the longer Waterfall strips, then piece these units to the top and bottom of the block.
Press all seam allowances open and your Path in the Snow Block should measure exactly 12 1/2 inches.
Embroider and piece 16 Path in the Snow blocks to create a Path in the Snow Quilt!


