Welcome back to the Machine Quilting Party! Today we're quilting Square Spiral which is a spiral stitched with all straight lines and right angles. This makes it very easy and fast to quilt with walking foot quilting.
Learn how to quilt Square Spiral in this new walking foot quilting tutorial:
Click Here to find the book Explore Walking Foot Quilting with Leah Day. Inside you'll find 30 fun walking foot quilting designs with tips on how to use them in real quilts. This book also includes the quilt pattern for Marvelous Mosaic, the quilt we're making together with these squares!
Check out the other tools and supplies shared in this video:
|
|
|
|
|


Tips for Quilting Square Spiral with Walking Foot Quilting

A few weeks ago we learned how to quilt Concentric Squares. This design wasn't very popular with quilters because it involved a LOT of thread breaks. Basically I cut my thread with every single little square and had to tie off and bury all of those thread tails too. That gets annoying really quick!
Square Spiral is a much faster version of this design and it's going to give you a very similar texture on your quilt. Instead of stitching squares, you're stitching a spiral, which is a continuous line quilted from the center of your quilt to the outer edges.
That means no thread breaks! Whoo hoo!
Quilting spirals are much faster and easier because it's continually moving out from the center. It's going to feel tough right in the middle of the quilt because you'll have the most bulk in the arm of your machine, but the more you stitch the easier it gets.
Just a quick reminder about my machine settings:
For walking foot quilting I always set the stitch length to 1.5 mm and place a Queen Supreme Slider on my sewing table to the left of the feed dogs like so:

However, for this Marvelous Mosaic Quilt, I have Minky fabric on the back which likes to grip the machine and table. When using this fabric on the back, I increase the stitch length to 2.5 mm.
What's that weird thing on top of my machine? That's a small magnetic pincushion and a cheater needle. I keep those handy for tying off and burying loose thread tails as I quilt. Click Here to check them out.
Turn the Spiral Clockwise

The most important tip for ANY spiral quilting design is the direction you begin quilting. If you start quilting counter clockwise, you'll be in for a world of hurt because you'll end up with double the quilt in the arm of the machine.
Make sure to turn the spiral clockwise. I always get turned around (ha! ha!) so the best way to ensure your spiral is going to turn the right way is to mark the starting lines on your quilt. Grab a fabric marking pencil and sketch the lines in place.
You will be SO happy you took the extra 5 seconds to ensure the spiral is turning the right way. As you quilt from the center, the quilt will steadily shift outward which means less and less of the quilt will be in the arm of the machine.
Less quilt in the machine + fast quilting design = Happy Quilter!
Do I HAVE to Quilt it So Densely?
No, definitely not. I like using the edge of my walking foot as a guide mostly because I'm lazy. The guide is right there, on the edge of the foot and I don't have to fiddle around with the guide bars or marking the quilt. I'm also a glutton for punishment because I like closer quilting to show off the textures I've picked for the quilt. More lines = more quilting texture.

So many of my quilting designs end up spaced 1/2-inch apart because I tend to use the edge of my walking foot as a guide. That gives me a perfect 1/2-inch spacing between the edge of my walking foot and the needle in center position on my sewing machine.
Unfortunately this also means I tend to spend a lot of time quilting! The closer spaced your lines of quilting, the more time it will take to quilt your quilt.
So please understand that you don't have to quilt this way. Use a guide bar or mark the Square Spiral design on your quilt instead. If you widen the space between the lines to 1-inch apart, you will cut the quilting time in half.
Why Do We Quilt Densely?
A better question to ask is why do we quilt at all? Quilting stitches are the glue that holds the layers of a quilt together and stops the batting in the middle from shifting. 200 years ago quilters were working with raw cotton which was a very inconsistent and a far cry from the beautifully needle punched / bonded battings we have to work with today.
In order for a quilt to wear well and last, quilters had to stitch densely through all the layers of the quilt (quilt top, batting, and backing) to hold the raw cotton in place. If the raw material in the center of the quilt shifted, it would go lumpy and weird.
Imagine sleeping under a quilt where all the fluffy material in the middle ended up on one corner instead of nicely spread out over the whole quilt. That's what would happen and what can still happen without the quilting stitches securing the batting in the middle layer of the quilt.
As for the amount of quilting - this can still effect the wearability of a quilt. If you want a quilt to last the test of time, slept under for years, dragged around the house and used to build forts in the living room, more quilting is better than less.
Would you like to learn new machine quilting designs and make a big, beautiful quilt?
That's what we're making with Marvelous Mosaic!
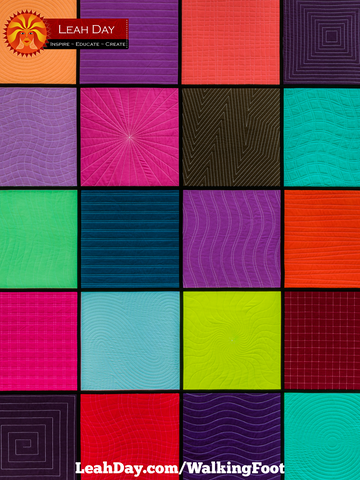
We're quilting all 30 designs from the book Explore Walking Foot Quilting with Leah Day and we're going to connect together the best 20 to create the Marvelous Mosaic Quilt. Find the quilt pattern and detailed instructions in the book, available in the following formats:
|
|
|
|


Click Here to find all the walking foot quilting videos I've shared so far. We're making three quilts together from this book and you can join in the fun and follow along anytime!
Let's go quilt,
Leah Day
Find more walking foot quilting tutorials by clicking the links below: