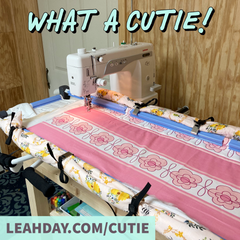
It's time to quilt the last section of our Heart Medallion Checkerboard Quilt - the border! This can be a tricky area to quilt because it's actually a lot of fabric to cover. If you quilt a dense quilting design, you could be working on that quilt a really long time. Learn how to quilt a big, bold Heart Paisley design in this new beginner quilting tutorial:

Heart Paisley is an easy free motion quilting filler design. Filler Designs are designs that can be memorized and quilted without marking it on your quilt.
Just like learning how to sign your name in cursive, filler designs are created by following a set of simple rules to create the shapes of the design and expand it so it covers your quilt with beautiful texture.
Find more beginner filler designs like Heart Paisley in the book Free Motion Quilting from Feathers to Flames.
Quilting a Two Part Border Design
For the Heart Medallion Checkerboard quilt, I knew I wanted to quilt Heart Paisley in the border, but I didn't want to quilt it in the entire border. Quilting the same design throughout this space would have been a great choice, but I wanted to stitch this quilt up a notch and try something new.

So I quilted Heart Paisley through two opposite corners. I started quilting in the middle of the border and stitched this filler design around the corner and stopped in the middle of the next side. I repeated quilting the same design in the opposite corner. After finishing this quilting, Heart Paisley filled approximately half the quilt border.
Because the straight lines had looked so good in the first border, I decided to quilt more evenly spaced straight lines in the outer border. Using my walking foot, I pulled up thread along the edge of the Heart Paisley shapes, quilted a straight line to the corner, turned the quilt, and stitched down to reach the next Heart Paisley shape.

I broke thread with each line of quilting and spaced the lines 1/2 inch apart using my walking foot base as a guide.
In the end, the border of the quilt was filled with two beautiful designs: Heart Paisley and Straight Lines and looks far more interesting and dynamic than it would have if it'd only been quilted with one design.
Can you do this with other designs? Absolutely! You can quilt borders with any combination of designs you like. Try drawing your ideas on paper first to see if it looks good, then quilt away!

Would you like to find hundreds of quilting designs you can quilt on your home machine? Find the largest collection of quilting designs ever published in the book 365 Free Motion Quilting Designs.
Don't forget you can go back and watch the other tutorials for the Heart Medallion Checkerboard Quilt anytime!
|
4. Quilting Heart Paisley |
Click Here to learn how to make the Heart Medallion Checkerboard Quilt.
If you enjoyed this series, consider taking a quilting class with me! We have created many online quilting workshops to guide you through all the steps to creating beautiful quilts. You will love taking a quilt workshop because you get to see each step of the quilting process with great instructions!


