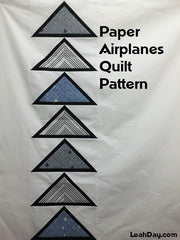
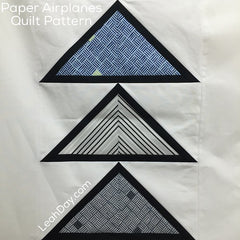
Take flight with paper piecing and learn how to create this easy Paper Airplanes quilt with help from Leah Day! This quick quilt will give you a great taste of paper / foundation piecing and create a beautiful modern quilt at the same time.
Paper Airplanes Paper Piece Quilt Pattern - Finished size 42 x 49 inches.
Are you looking for the free quilt pattern for the Paper Airplanes Quilt? Click Here to download this free quilt pattern.
 Extra Tips and Tricks
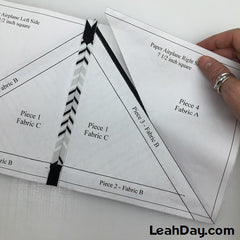
Paper piecing is a fun and easy way to piece perfect quilt blocks. Instead of cutting shapes and depending on seam allowance to create sharp points, the lines on the printed paper provide your stitching line, ensuring your blocks finish exactly right every time. The best part of the Paper Airplanes quilt is it gives you a great taste of paper piecing without a huge commitment.
Make sure to print the pages of your pattern at full size with no shrinking or scaling. We've provided handy 1 inch squares on the pattern pages so you can check that the pages are printing exactly the right size.
It's also important to use cheap, lightweight copy paper when printing the paper piecing pattern pages. The lighter the paper, the easier it will be to see through it and rip it away at the end.
 When to Rip the Paper
There really isn't a definitive perfect time to rip the paper off your paper pieced blocks. For this quilt I waited to remove the paper until the top was completely pieced, but I know you can rip the paper sooner if you wish.
As you rip the paper, be gentle with the stitching lines, particularity at the edges of blocks and where multiple seams come together.
Planning the Quilting Design
Originally I'd planned to quilt the background of the Paper Airplanes quilt with lots of flowing designs and complicated motifs. But then the straight lines from the notebook paper fabric really got stuck in my head and I realized I just wanted to quilt this quilt with straight lines. Check out how I did it in this quilting tutorial:
Click Here to find the Fine Line Pen to mark this quilt top.
Click Here to find the tutorial on securing thread breaks.
 Basting the Paper Airplanes Quilt
After marking the quilt top, the next step was to baste it with backing and batting to create the quilt sandwich. I decided to piece the backing for this quilt using leftover fat quarters from previous Quilty Boxes to create a bright, cheerful backing.
But I didn't want the bright colors on the back showing through the white fabric on the front of the quilt so I choose to use 2 layers of batting for this quilt: Quilters Dream Puff and Hobbs Heirloom Wool. It's really fun to layer batting like this and creates a super soft and squish quilt!
Super Easy Quilting Design
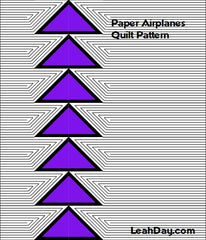
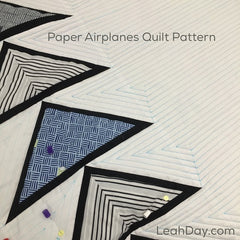 Once the quilt was securely basted, it was time to start quilting! We began by stitching in the ditch around the airplane blocks with black thread, then switched to light blue thread and began quilting the straight lines from the points of the triangles to the edges of the quilt.
Quilting this quilt was as easy as stitching right on the marked lines! I used a walking foot to quilt all of the lines quickly and easily and even though the quilt was extra puffy from the additional layer of batting in the middle, it was still very manageable on my home sewing machine.
So that's it for the Paper Airplanes Quilt!

