One of the hardest decisions in this project was whether to stick build or purchase a prebuilt shed. I honestly waffled back and forth on this decision for weeks because both were equally good decisions.
Going with a prebuilt shed had the advantage of the shed being completely built, with a roof and studs ready to be finished on the inside. A prebuilt shed also had the advantage that we could work on it slowly, as time and money allowed, and store our tools inside the finished building.
Stick building had the advantage of being able to build as big as I wanted, and being able to insulate the floor easily from above. However, we just didn't have the time or energy to build completely from scratch. It would likely have taken us a month just to get the walls and roof in place!
Cost wise, prebuilt barns and sheds like the one we selected are very competitively priced. I didn't run the numbers to compare, but considering the building materials, time to put it together, and exterior finishing, I believe prebuilt sheds to be quite a bargain.
In the end, Josh helped me make the decision to pick out a prebuilt shed and convert it to a smaller craft space that would specifically fulfill my needs.
Purchasing a Prebuilt Shed
Focusing only on the 8 foot wide buildings, we found many choices - lofted, not lofted, metal, wood, barn door, or insulated door. Of course, we could have special ordered any length of building, but I decided to select a building on the lot that was ready to deliver.
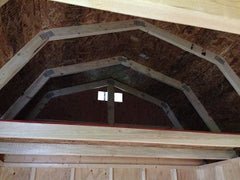
Another consideration was the height and loft of the building. Many barns come with a dutch style roof and two loft spaces around four feet wide and six feet from the floor. These lofts could be very handy for storing all sorts of craft supplies and sewing machine boxes.prebuilt shed | converted shed

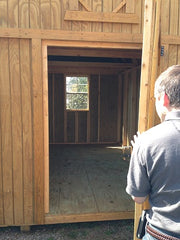
A major selling point for the barn I picked was the studs. They were set 16 on center, meaning there was a 2 x 4 placed every 16 inches along the walls. Most of the other buildings we toured were built 24 on center. Though both 16 and 24 on center are standard building code, I liked the idea of more studs and stability in my little barn.
Small things like this can be the deciding factor in your barn choice. It does help to know what you want and what you are looking for as you begin touring building sites.
Visualizing You Future Craft Room
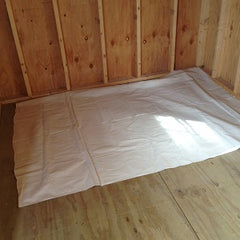
Finally I had the idea to stage the space so I could visualize sewing in it. I cut a large piece of canvas fabric the size of my sewing tables and took it with me to the barn display. Unfolding the canvas, I was able to easily see how much space I would have and how the shed could be arranged in the most efficient way possible.
Most importantly, I was able to easily see that my setup could fit within the smaller shed size. Going with a smaller building meant less materials cost, heating and cooling cost, and less time spent finishing the interior before it would be ready to use for sewing and quilting.
If you are considering a similar project, here are some questions to ask yourself:
- Where will your shed be placed? How much space is available for your shed?
- Now look at the route the truck will have to take to deliver your shed. Is there at least 2 feet more space than the size of your shed throughout this route? Don’t forget to take power lines, gates, fences, trees, and other buildings into consideration.
- Do you want a loft in your barn? Do you have a preference on building materials or styles or colors?
- Do you have a sewing setup right now that you would like to fit into your new studio? Can you create a template of this setup with cardboard or fabric so you can visualize how you will use your new space?
- How much money do you have to budget for your project? My small 8 ft x 12 ft building cost just over $2000, but we're budgeting another $2000 in building materials to finish the interior with insulation, beadboard paneling, and awesome lighting.
Ultimately it's important to have a solid plan for your craft room and your goals for the project. I had to rein in my desire to go with the biggest possible building because we just didn't have the budget to finish a larger space. Knowing what you want and having a clear goal for the project will make it much faster and easier to complete.


