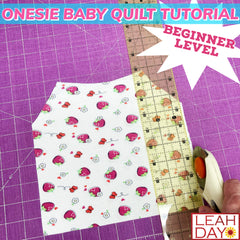
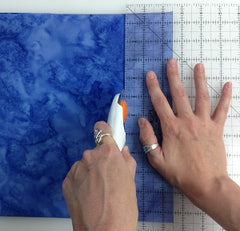
 Once upon a time, we cut out the pieces of our quilts with cardboard templates and scissors. Thankfully technology has improved and we can now cut fabric with a rotary cutter, a sharp, pizza cutter like blade that can cut through four layers of fabric at a time.
Cutting your fabric is one of the most crucial steps in the quilt making process because because it creates the shapes you will piece together to create quilt blocks and ultimately your whole quilt top.
Imperfect, imprecise cutting can lead to issues with piecing like mismatching seams and blunted triangle points. The better you cut your fabric, the better your quilt will come together and the easier the quilt making process will feel.
How to cut fabric with a rotary cutter:
Step 1 - Prewash Your Fabric - Yes, the first step to rotary cutting is preparing your fabric properly. Wash your fabric with a mild detergent and be on the look out for any migrating dyes.
Throw a small square of white fabric or a dye catcher into the wash. If the white fabric comes out discolored, wash your fabric again, and keep washing it until a white scrap or dye catcher comes out clean.
Step 2 - Starch and Square Your Fabric - You can't cut fabric accurately if unstable and out of square. Starch and press the fabric to create a stiff, stable surface and reduce the stretch of the fabric so it's easier to cut precisely.
All fabric has a grainline, and if you cut on-grain your pieces will have the minimum amount of stretch and give, making them much easier to piece perfectly together into a beautiful quilt.
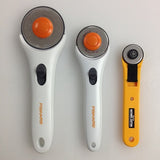 Step 3 - Gather Your Cutting Supplies - You will need a rotary cutting mat, which is also called a self healing cutting mat. This means that you can cut on this mat with a rotary cutter and it will not leave a mark or scar the surface.
You will also need a rotary cutter with a sharp blade. If you've been quilting for awhile, or maybe "accidentally" cut something other than fabric with your blade, it might be time to change to a fresh blade before cutting out a new quilt. A sharp rotary cutter blade should be able to cut cleanly through four layers of fabric at a time.
Step 4 - Cut your fabric - Finally! Pick up your rotary cutter and go to town. Make sure to check out this video so you know how to cut most efficiently.
Watch this video to learn how to cut your fabric precisely with a rotary cutter:
Wondering how you will cut left or right handed with a rotary cutter? Wishing you had some fun beginner level projects to start with?
Find a wealth of information on fabric cutting and quilt piecing in the book How to Piece Perfect Quilts. This book is specially written for beginner quilters and explains every step of piecing quilts precisely and how to match every seam just right!


