I love yoga and try my best to practice daily. Over the years I've met some of my best friends through yoga and meditation classes and this spring I wanted to create a special gift for three special women in my life. Creating a yoga-themed wall hanging inspired by the energy chakras in the body sounded like a perfect project that all of them would enjoy.
Of course, my time is very limited so I instantly thought of creating the project using designs from an embroidery CD I created with Janome back in 2013. These designs are digitized to stitch out automatically on an embroidery machine so I can be working on something else while the machine is busy stitching out each design.
Now I designed this collection back in 2013 and I think making a chakra wall hanging was about the last thing on my mind! The collection comes with many beautiful designs and I had fun picking the designs that would correspond best with each chakra.
 How to make your own Chakra Embroidered Wall Hanging
Creating each design for the wall hanging was very simple, but it did require a bit of fabric preparation and cutting to get started. Here's the material list if you would like to make one for yourself:
Chakra Wall Hanging Materials List
Embroidered Blocks:
Seven embroidery designs - New Collection Coming Soon!
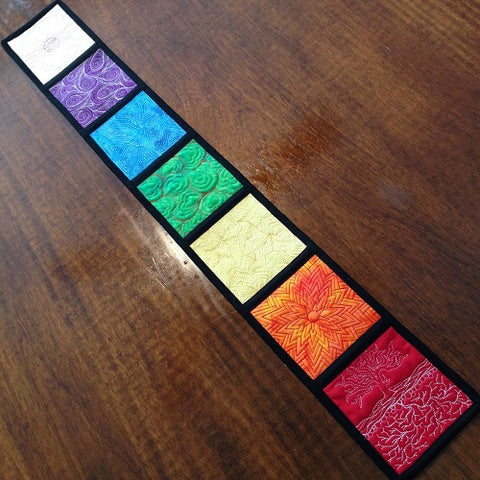
1 - 6-inch square of cream, purple, blue, green, yellow, orange, and red batik fabrics.
7 - 6-inch squares of batting (I used Quilter's Dream Blend for my project)
1 yard of backing fabric - this will vary greatly depending on the size of your hoops
Binding Fabric:
Cut 1 - 1 x 42-inch strip of black fabric for back binding, then cut this strip into 6 - 1 x 5.5-inch strips
Cut 1 - 1.5 x 42-inch strip of black fabric for front binding, then cut this strip into 6 - 1.5 x 5.5 inch strips and fold them all in half
Cut 2 - 2-inch strips of black fabric for edge binding and connect together with a diagonal seam to reduce bulk
For this project you will need a small embroidery hoop capable of stitching out a design at least 4.25 inches square. I stitched out my designs on both a Janome Horizon 15000 and Bernette Deco 340.
Learn how to embroidery the blocks for your Chakra wall hanging in the video below:
Directions for creating the Embroidered Chakra Wall Hanging:
-
Slice your backing fabric into pieces that are 1-inch bigger than your hoop on all sides. Hoop this fabric so it's tight in the frame, but not stretched out of shape.
-
Layer one 6-inch piece of batting in the center of the hoop. Layer one 6-inch fabric square on top.
-
Place the hoop in your embroidery machine and if you have the option, run a baste stitch around the edge of the hoop to secure the layers together.
-
Select your design and double check the size. You need the design to stitch out a bit bigger than 4 inches, which corresponds with 105 - 110 mm square. Resize any designs as needed so they will finish slightly larger than 4 inches. If you have the ability, run a basting stitch around the design to secure all the layers together before stitching out the embroidery design.
-
When the embroidery is complete, trim the block down to 4.5 inches square. Repeat this process with each fabric square and design until all seven have been embroidered and trimmed to size.
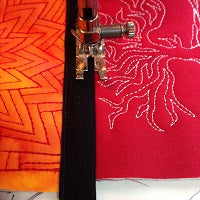
Quilt As You Go Binding Method
|
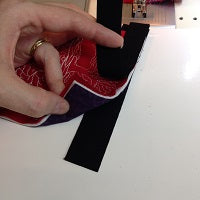
Starting with the upper edge of the red square, place a 1-inch back binding strip on the back and a 1.5-inch folded binding strip on top. Stitch with a 1/4 inch seam allowance. Repeat stitching front and back binding to each square except the cream colored square. |
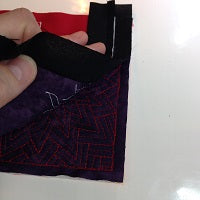
Finger press the 1-inch back binding over and place the red square wrong sides together with the orange square. Stitch through the orange square and back binding with a 1/4 inch seam allowance. Open up the squares and both seam allowances should nest together perfectly in the 1/2-inch channel created by the back binding. |
|
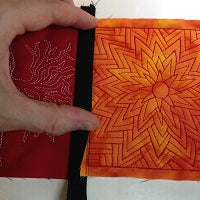
Finger press the folded front binding over and stitch close to the edge on both sides to finish. Repeat this process to connect each block together using the binding strips. |
Trim down the long edges of the wall hanging to even up the sides and trim off excess binding. Bind the outer edge with the 2-inch binding strip using your favorite method. |
Finish your chakra wall hanging with a small hanging sleeve and enjoy this small decorative quilt anywhere in your home!


