Ready to make a beautiful t-shirt quilt from all of your awesome t-shirts? Let's learn how to make an easy t-shirt quilt step by step using simple materials and basic sewing and quilting skills!
Jump ahead in this quilting tutorial:
Table of Contents
- Easy T-Shirt Quilt Video Tutorial
- Sorting T-shirts for Your Quilt
- How to Prepare the T-shirts for the Quilt
- Stabilizing the T-shirt Material
- Cutting the T-Shirts into Useable Shapes
- Piecing the T-shirt Blocks
- Steps to foundation piece your T-shirt blocks
- Selecting Fabrics and Scraps to Use
- Quilting a T-shirt Quilt
I recently went through the two big bags of clothing I've been saving for years and decided it was high time we turned these t-shirts, jackets, and pants into a big quilt.
If you've been wanting to make a t-shirt quilt too, this is a great opportunity to learn the basics of quilt making and make a fun quilt that will allow you to enjoy your favorite t-shirts for many more years.
Easy T-Shirt Quilt Video Tutorial
Watch the video below to see a detailed tutorial on how I created my T-shirt quilts:
Would you like to find an even easier T-Shirt quilt method? Click Here to find a new tutorial with a much faster method.
Sorting T-shirts for Your Quilt
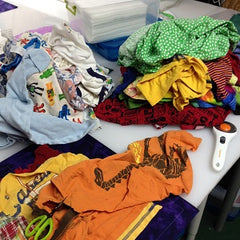 To start the project, I first sorted all the clothes into different stacks. Being a boy, my son mostly had blue, green, and red tshirts, but there was quite a lot of plaid shorts and tie dyed tshirts in the mix too.
Quickly I could see that the white garments didn't quite fit with the other bright colors so I divided out all the t-shirts that had large amounts of white background and set them aside for a second, smaller quilt.
I could have easily divided the t-shirts by color even further - making one quilt in red and another in blue. I think the biggest key to start is checking out all the fabrics and colors you have and decide what will look best.
How to Prepare the T-shirts for the Quilt
 The next step is to take the t-shirts and turn them into quilt material. You don't need seams, collar, sleeves, pant legs, or any other garment additions for the quilt.
To start, I used a pair of big scissors to roughly cut off the t-shirt's collar, hem, sleeves, and side seams. Most t-shirts only had decoration on the front side, so that was the side I focused on saving in as big a shape as possible.
I also saved the back of the t-shirt when it had a nice design like these tie-dyed shirts.
If you have a rotary cutter and ruler, this will likely go a bit faster, but scissors worked just fine for roughly cutting down each shirt. It was a LOT of garments to go through so I kicked back and enjoyed the process while watching a movie.
Stabilizing the T-shirt Material
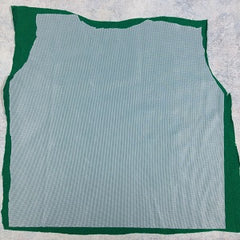 T-shirts are made from knit material, which is stretchy and soft - part of the reason why t-shirts are so comfortable! But for quilting, this stretchiness can be an issue. For one thing, quilts need to be quilted with stitching that runs through the top, batting, and back of the quilt. As you stitch over stretchy fabric, it tends to stretch out and expand, creating potential pleats and puckers on the quilt surface.
For this reason, it's a good idea to stabilize your t-shirts using a knit interfacing. I like to use French Fuse Interfacing, which is a very lightweight knit interfacing that leaves the fabric feeling super soft, but stable enough not to stretch out of control during the quilting process.
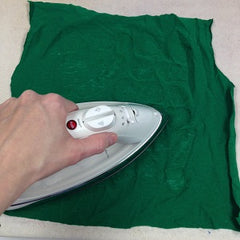
To add the french fuse, I laid the t-shirt square right side down on my ironing board, then cut a piece of French Fuse to be slightly smaller than the t-shirt square. Make sure the rough, glue side of the French Fuse is face down so it will stick to the fabric.
Place a piece of scrap fabric on top of the stack to act as a pressing cloth and then press with a hot, dry iron. If you press directly on the French Fuse, it will likely melt under high heat. If you'd prefer to press this way, simply lower your iron to the low setting and be gentle as you press to fuse the layers together.
Cutting the T-Shirts into Useable Shapes

This last step of the t-shirt prep will truly make the shirt ready to put in a quilt. Using a rotary cutter and ruler, cut down the t-shirt into a square or rectangle shape.
If you want to be adventurous and cut odd shapes or angles, that's fine too, but these can be more challenging to piece around. If this is your very first quilt, make it easy for yourself by cutting the shirt into a square or rectangle that will be simple to piece around to build your block.
My full-time piecer employee and I knocked out this big job together and cutting the entire stack down at once so at the end I had a big stack of stabilized squares ready to piece.
Piecing the T-shirt Blocks
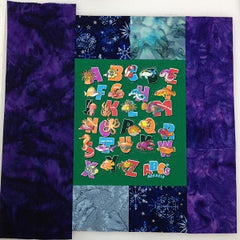 When planning my t-shirt quilt, I decided to surround the t-shirts with 100% cotton fabric and other pieced blocks and scraps I had from my stash. The method I used to piece the blocks is called Foundation Piecing because I pieced everything on top of one big 18 inch square of fabric.
Why did I chose this method? Mostly for stability. Piecing on top of a 100% cotton square helped to stabilize the t-shirt material. The foundation also acts as a safety valve in case the t-shirt material begins to fray apart. Instead of a hole opening onto the quilt batting, it will open to more 100% cotton fabric.
Steps to foundation piece your T-shirt blocks
1. Prepare an 18" foundation fabric square by prewashing, starching, and pressing to create a firm, slightly stiff base for the block.
2. Place a prepared t-shirt square in the middle.
3. Selected a scrap of fabric the length of the square and placed it over the t-shirt square, right sides together. Stitch through the foundation fabric, t-shirt, and fabric scrap with a 1/4 inch seam allowance.
4. Flip the scrap fabric over and press with a hot, dry iron to flatten the seam.
5. Select a piece of fabric to fit along the bottom edge and repeat the piecing and pressing step. Finish by adding scraps to both sides of the block in the same manner.
6. Trim down any excess fabric that extended beyond the edge of the block. Mark a 16 inch square in the center of the block and stitch carefully through all the layers along this line. This will stabilize the edge of the block and give you a helpful boundary line for your quilting later.
Selecting Fabrics and Scraps to Use
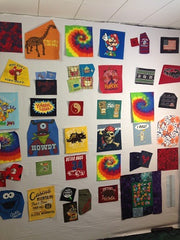 Building the blocks can also be as easy as selecting one color of cotton fabric and cutting wide 5-inch strips to piece around the central t-shirt squares. This was the method I used for my white quilt and piecing these blocks was much faster and easier than the scrappy blocks because only one color was involved.
Technically you can use any fabric with this foundation piecing method so long as you use typical 100% cotton woven fabric for the foundation layer. If you plan to use fabrics with stretch, make sure to stabilize them all with French Fuse Interfacing before piecing around the t-shirt square.
For the multi-colored quilt I used scraps of 100% cotton fabric, precut 2-inch strips of fabric, and leftover orphan quilt blocks from previous projects. This type of cotton fabric most common for quilting has very little stretch and is easy to find in precut squares and strips. The precut shapes will be fun and easy to work with because they're already cut to a convenient size.
One way I helped make the multi-colored quilt more cohesive was finishing each block with a bit of black fabric along the outer edge. When the blocks are complete, I plan to use black binding to connect them all together. Using a strip of one fabric color around the outer edge may help to tie the quilt together nicely at the end.
Basting the T-shirt Blocks
To turn these t-shirt blocks into a quilt, the final step is to baste and quilt them! Of course, you can square and piece all the blocks together to make one massive quilt top, but this could be challenging to quilt on a small, home sewing machine.
Instead, consider quilting the blocks separately as 18-inch squares, then when they are quilted, you can put them together with binding strips. This is called Quilt-As-You-Go because you're quilting each block as you go through the quilt, then putting them together at the end to finish the project.
To baste each block, prewash, starch and press several yards of fabric or fat quarters and cut them into 18-inch squares. Also slice your batting into 18-inch squares.
Layer the backing fabric right side down and secure the corners and sides with masking tape to your table to prevent shifting. Cover with your layer of quilt batting, then top with the pieced t-shirt block right side up.
Secure all three layers together using your favorite quilt basting method.
Quilting a T-shirt Quilt
The final step to finishing these blocks is to quilt them! You can quilt your T-shirt quilt blocks with a variety of free motion quilting designs. Learn how to quilt 30 beautiful, beginner level designs in the workshop Beginner Free Motion Quilting Fillers.
You'll learn not only how to quilt many designs, you'll also learn how to connect your blocks together using an easy Quilt-As-You-Go binding method as well!

