This is it! We’re finishing up the Prism Path baby quilt today by quilting Matrix in the background with walking foot quilting. Learn how to quilt this design in this new video:
Where do you find the instructions for piecing this pretty rainbow baby quilt? Find the cutting chart, diagrams, and everything you need to make your own Prism Path quilt in the book Explore Walking Foot Quilting with Leah Day.
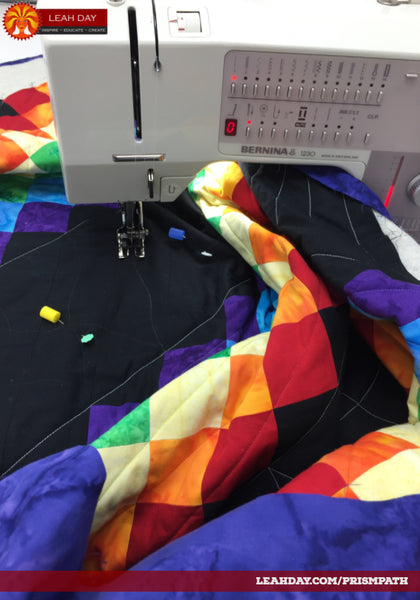
Quilting a Bargello Baby Quilt on a Home Machine
When quilting on a home machine, our path is always working from the center to the outer edges. This allows any excess batting or fabric to shift outwards and reduces the chance of puckers and pleats forming on either side of the quilt.
This feels a lot easier and will move faster if you place your machine in a flatbed / drop down sewing table. This will get the needle area of your sewing machine on a flush surface with the table so you don’t have to push or pull it over the arm of your machine. Click Here to check out our Affordable Sewing Table.
To quilt Matrix, just pick the point of one of the lines we marked, pull up your bobbin thread to the surface of the quilt, and begin stitching along the curving line. Just a quick reminder, I always set my stitch length to 1.5 mm to produce a nice, small stitch when walking foot quilting.
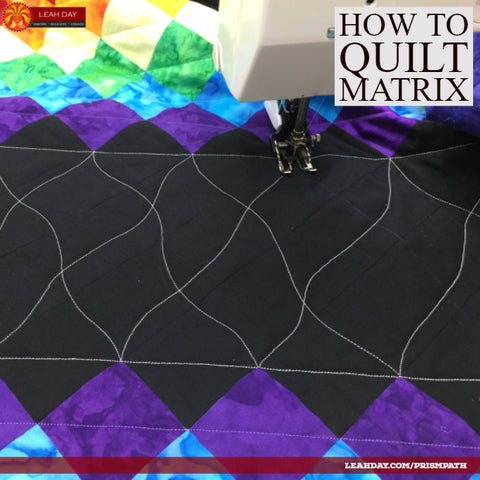
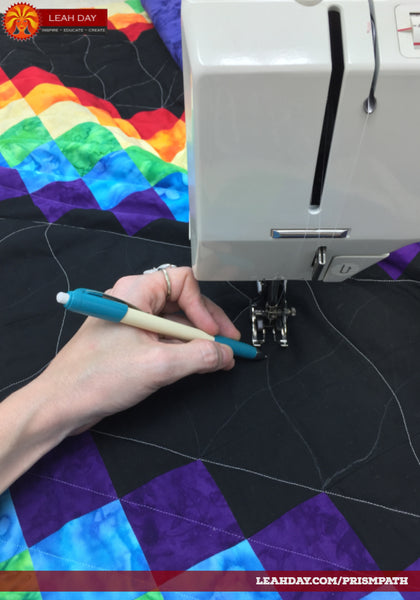
When you stitch to the curvy point on the corner of a red or purple square, rotate the quilt around so it’s facing the next direction properly, then continue quilting the next gentle curve. Place your hands on the quilt to either side of the line you are stitching and watch out for whiskers - those diagonal lines that appear as the fabric begins to shift sideways.
If your curves are a bit deep, stop with the needle in the down position and lift up the foot slightly. Smooth out the fabric, shift it slightly into the new direction you’re quilting in, then drop the foot. This will lighten the pressure on the quilt and reduce the chance of whiskers getting worse and turning into pleats.
Quilting Three Lines Both Ways
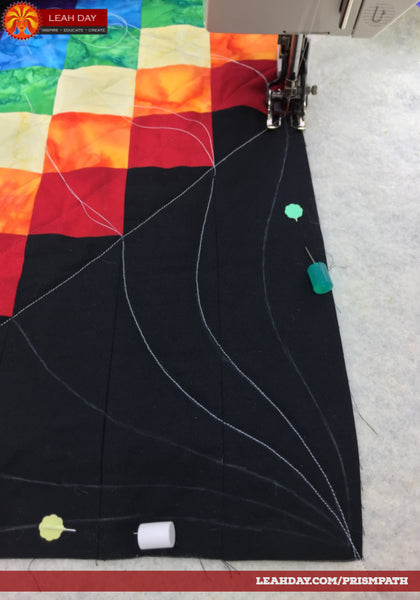
We have two big background areas in the Prism Path baby quilt and both are quilted completely with Matrix. We marked three sets of curving lines and because we quilt from the center, that means we’ll quilt three lines going in one direction, then tie off and bury those thread tails. Then we’ll finish quilting that area with three lines stitched in the opposite direction.
When quilting Prism Path I found one direction felt pretty natural and easy. Less quilt was in the arm of the machine, it wasn’t too bulky, and I was able to quilt the curving lines easily.
Of course, this means the other direction didn’t feel the same at all!
When I pulled up thread to quilt the opposite side of that line, the quilt now felt crammed into the side of the machine. It was bulky and challenging to shift because of the angle I had to quilt it to complete the Matrix design.
This can happen when you’re quilting on a home machine and you just have to stitch through it! You stitched yourself into this mess, now you have to stitch your way out of it. The saving grace is all of these lines are short so even if it feels bulky and challenging, it won’t last for very long.
Free Motion Quilting verses Walking Foot Quilting
I've talked a lot this year about the difference between free motion quilting and walking foot quilting and at the end of this video, I decided to show you the difference.
The quilt was feeling pretty bulky and I wanted you to see a major advantage of free motion quilting which is you don’t have to shift the quilt into the direction you are quilting.
With this form of quilting, you can quilt in any direction (so long as your machine likes it) and you don’t have to shift the quilt to face the line you’re stitching like with walking foot quilting.
The difference lies in how we use the feed dogs. With walking foot quilting, we are using the feed dogs, plus the stitch length setting on the machine to set the size of our stitches. This means we are also stuck feeding the quilt through the machine in the traditional sewing way - from the front to the back - for every line of quilting.
With free motion quilting, we don’t use the feed dogs. Some quilters drop their feed dogs. I prefer to set my stitch length to 0 and cover them with a Free Motion Glider. The little teeth will still bounce up and down, but they will not actively feed the quilt forward and pull against you.
This means you will lose one very important thing - a set stitch length.
Instead of having beautifully spaced, even stitches measuring exactly 1.5 mm long, free motion quilting is entirely hand guided. You control the stitch length and look by balancing the speed of your hands moving the quilt and the speed your machine is running.
This means you can easily get big chunky stitches, then microscopic stitches, then monster stitches, then a handful of normal stitches before it goes haywire again. It takes time and practice to balance your speed and hand movement until you form even, consistent stitches all the time.
But the advantage with free motion quilting is you can shift the quilt and move in any direction you like. You can rotate the quilt around so you have less bulk in the arm and quilt Matrix backwards if that works for you.
This sounds idyllic and awesome, but there is a catch - your machine may not like stitching in some directions. If you suddenly break thread when quilting to the left, that may be a sign that your machine doesn’t like that and you probably won’t be able to talk it into it. You will have to quilt a lot, get to know the quirks of your machine and figure out exactly what it likes and doesn’t like to do with free motion quilting.
Another thing is not every direction will feel good for you to quilt. You might have less bulk in your machine if you stitch to the right, but if it feels like you’re trying to pat your head and rub your tummy at the same time, that’s not going to end up looking very good on your finished quilt.
You have to position the quilt in a way that feels comfortable for you to push or pull it through the machine, while also stitching the design you’re quilting. This is doing many different things at the same time and it definitely helps to mark your quilting design on your quilt so you know what you’re stitching at least.
Following marked lines like this, no matter whether you’re quilting with a walking foot or with free motion quilting is NOT cheating. It’s the best way to begin quilting and take one bit of guess work out of the equation.
Quilting the Corners
The last area of the Prism Path Baby Quilt we have to quilt is the corners. Instead of continuing the Matrix design, I decided to fill this space with a bit of Wobbly Cosmos which is basically just curving lines that meet at a central point - in this case the corner of the quilt.
I quilted each line separately, pulling up thread on the corner of the red or purple square, then quilting off the corner into the batting. Wash and repeat until you’ve stitched all of the lines past the corner and your Prism Path baby quilt will be complete!

How to Finish Your Prism Path Baby Quilt
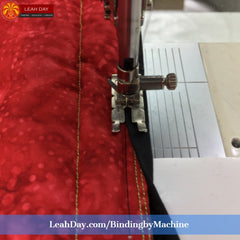
The last step of the quilting process is to bind the edges of your quilt so it can be used and enjoyed. This process can be a bit tedious and it's often the step new quilters are surprised by when they first get started. The great news is you can bind a quilt entirely with your sewing machine! Click the links below to learn how to prepare your baby quilt for binding, make the binding strip, and attach it to your quilt entirely by machine:
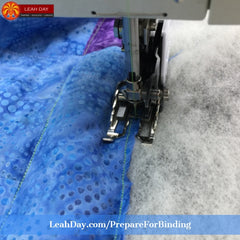
Prepare Your Quilt for Binding
How to Binding a Quilt by Machine
I’ve really enjoyed quilting along with you on the Prism Path baby quilt. I hope you’ll join me for another quilt along and learn more about quilting on your home machine. Click Here to find another quilt along!
Let's go quilt,
Leah Day
Find all of the posts for this bargello baby quilt along by clicking the images below!


