Stippling is one of the most popular free motion quilting designs, and the first design I learned how to quilt as a beginner. Stippling is also referred to as Meandering because the lines randomly meander over your quilt without crossing.
It can be a bit tricky to learn how to quilt Stippling without stitching yourself into a corner. In this quilting tutorial we're going to learn about Stippling, why it's so popular for beginners, and I'll share a few alternative Stippling patterns for you to explore.
In this Stippling / Meandering Quilting Tutorial you will learn:
Table of Contents
- Free Motion Quilting Stippling on a Home Sewing Machine
- The Rules of Quilting Stippling or Meander
- Stipple Quilting Pattern Texture
- Quilting Stippling on a Longarm Machine and Quilting Frame
- Home Machines can work on Quilting Frames too!
- QUILTING VIDEO - Ultimate Stippling Machine Quilting Tutorial
- More Stippling Patterns for you to Quilt!
- Leah's Favorite Four Free Motion Quilting Designs
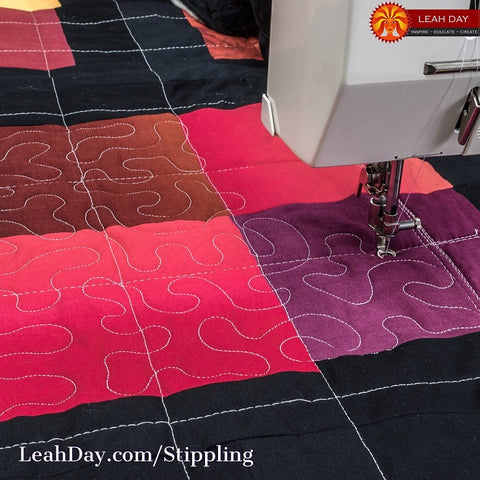
Free Motion Quilting Stippling on a Home Sewing Machine
For this beginner machine quilting tutorial, I begin by free motion quilting on a home sewing machine which I've placed in my quilting sewing table. This is a stationary or sit-down quilting setup so I'm pushing the quilt with my hands to form the stipple design.
I don't use a stitch regulator when my home machine is set in a table. I prefer to control the speed of the machine by pressing my foot pedal and speeding up or slowing down as needed.

When quilting on a home machine, I use Machingers quilting gloves to help my hands grip the quilt and give me lots of control over the quilting design. It's really essential to have something on your hands that helps grip the quilt top, otherwise the fabric tends to slip under your fingers.
I also place a Free Motion Glider over the machine to make the quilt easier to move. This slippery Teflon sheet helps to minimize friction between the back of the quilt and the surface of the machine and table.
Another tool I keep in my home sewing machine all the time is a bobbin washer. This little disc helps my bobbin thread feed as evenly as the top thread so the back of the quilt will look as good as the front. It also helps to reduce thread breaks - something I always want to avoid!
The Rules of Quilting Stippling or Meander
All free motion quilting filler designs have basic rules that govern how they are stitched. These rules are as simple and easy to memorize as the rules behind cursive writing. Once you memorize the rules of quilting a design and practice quilting it, you will be able to quilt it anywhere.
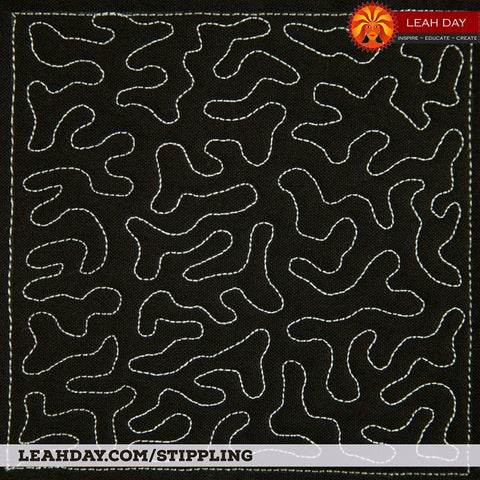
The rule behind Stippling is very simple:
Stitch a wiggling, meandering line that doesn't cross itself.
It's important to note that this is a specific rule only to Stippling. It has confused many beginning quilters into thinking that we are not supposed to ever cross our lines of quilting. Please understand that it's perfectly fine to cross your quilting lines, and there are many designs we use in quilting that involve crossing and travel stitching to form the design.
A great way to practice Stippling is by drawing it on paper because the same metal muscles that you use to draw the design will be used to quilt it.

This quilting worksheet can be found in the Free Motion Basics for Beginners workshop. You can print this page as many times as you need and practice tracing and quilting this design. It's important to trace a quilting design with a pencil because it will help you learn the design and commit it it to memory, much like learning cursive writing.

Stipple Quilting Pattern Texture
Stippling has a very unique texture that appears to flatten or recede into the background of a quilt. It's perfect for machine quilting densely into the background areas of a wholecloth quilt, or expanding to a large scale to quilt a soft bed quilt. Because Stippling is so popular, many quilters feel that it's a bit overused, and even I found myself stuck for years in a Stipple rut.
However, Stippling is a terrific machine quilting design to learn because it will help you build skills for moving the quilt smoothly, estimating space, echoing, and controlling the quilt. Stippling is also extremely versatile - it can work on any quilting scale and is very quick to quilt over large areas.
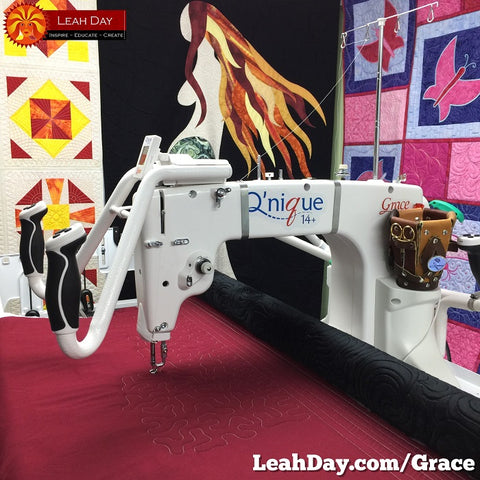
Quilting Stippling on a Longarm Machine and Quilting Frame
Since Stippling was one of the first designs I learned to quilt on my home machine, I figured it would be an easy design to learn how to quilt on my Qnique longarm machine and quilting frame as well. Turns out it's a terrific design to learn the basics of moving the machine over the frame because you can stitch very simple rows of the design.
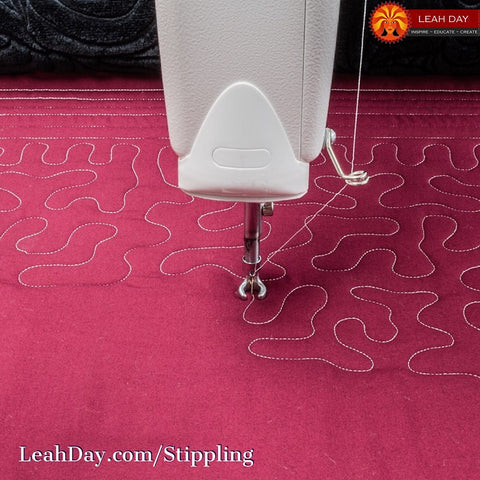
My goal when quilting this design on a longarm was to move slowly and stitch the design consistently. It wasn't perfect, but I felt like it would be even easier to quilt this design really big with 1-2 inches between the lines of quilting.
That would secure more of your quilt even faster and easier too. Because you don't have to stop and shift constantly through the arm of the machine, I think it will feel a lot faster and easier to quilt on a quilting frame too.
Home Machines can work on Quilting Frames too!
In this quilting tutorial, I used a home machine set in a sewing table and a longarm on a quilting frame. But did you know you can put your home machine on a quilting frame too?
The key with using a home machine on a quilting frame is making sure you have a big enough harp space - that's the distance between the motor of your machine and your needle. If your sewing machine has at least an 8 inch harp space, you can make machine quilting feel much, much easier by putting your machine on a frame.
Click Here to find the quilting frames best suited for home sewing machines.
QUILTING VIDEO - Ultimate Stippling Machine Quilting Tutorial
Now let's watch the video and learn how to machine quilt Stippling on a regular sewing machine and on a longarm machine.
Remember, it really doesn't matter which type of machine you're using. The key is to memorize the rules for quilting the design, practice it, then quilt a few real quilts to fully get the hang of the design:
More Stippling Patterns for you to Quilt!
Stippling is absolutely one of the most essential designs quilters should learn to machine quilt, just remember not to quilt it to death! I consider free motion quilting filler designs just like working with different colors of paint, and you wouldn't only paint with one color for five years?
It's good to learn a design like Stippling, but keep expanding your skills with new design and exciting textures to use in your quilts.
Here are six Stipple patterns that are very similar to the rules of the popular Stippling design, but are quilted a little differently so they add a different quilting texture to your projects:
Leah's Favorite Four Free Motion Quilting Designs
When I first started free motion quilting, I learned Stippling and quilted this design for more than two years on every quilt that I made! It was a relief to discover there were many more quilting designs to play with.
Check out the first four designs that I learned how to quilt and find quilting videos for each design stitched on a home machine and longarm machine:
If you enjoyed this quilting tutorial, please share it with your quilting friends or link to it from your website or blog. We really appreciate you spreading the word and sharing the love of machine quilting!
Let's go quilt,
Leah Day


