Let's learn how to quilt a pretty wavy border with the Super Slide ruler!
Quilting a Wavy Border with the Super Slide Ruler
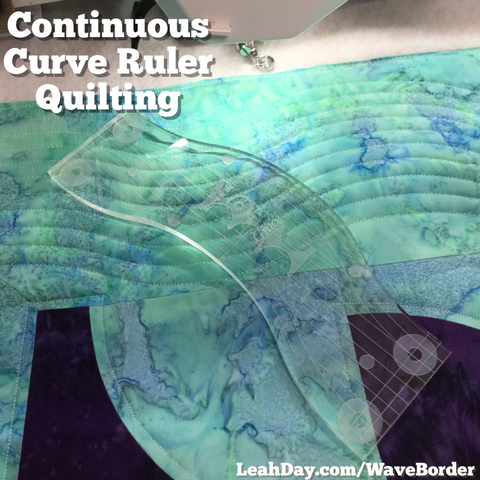
To start this process, I found the midpoint of my border and pulled up thread in the center. Using the Super Slide Ruler, I quilted a curving line from the center the miter seam in one corner.
Then I returned to the center of the quilt and quilted another continuous curve to the opposite corner. This set a foundation for my wavy border that all the other lines would follow.
Once that first line is set, you'll use it as a guide! Align your Super Slide ruler with the curving etched line 1 from the edge on top of the line you just quilted. This will give you 1/2 inch spacing between your lines of quilting.
Quilt a new curving line from left to right. This will have your quilt running through the machine front to back, which is the best direction for your machine for the least number of thread breaks or skipped stitches.
Continue using the last line as a guide to quilt the next line until the entire border is filled. I was able to quilt the entire 6 inch border now that I'm using my Janome Horizon 8200 on my Hoop Frame Pro. I have almost 8 inches of quilting space which makes a huge difference on projects like this!

This was a fun design and a great way to emphasize a mitered pieced border. I figure if you bother to piece a border this way you should get credit for it.
Just in case you'd like to learn how to piece a mitered border, I shared how to master this technique in this book.
Even if you don't piece a miter, you could mark a diagonal line across your corner to give you the same effect.


3 comments
Hi Andrea – Yes! Just make sure to select the thinner rulers (1/8-inch thick) if you have a low shank sewing machine. If you have a bigger sewing machine, you’ll need the thicker rulers.
Is this usable on a domestic machine?
Hello Leah,
Very nice video you made. I love the teal fabric color.
You seem to have a very advanced video set-up to film this tutorial.
Kind regards,
Martha