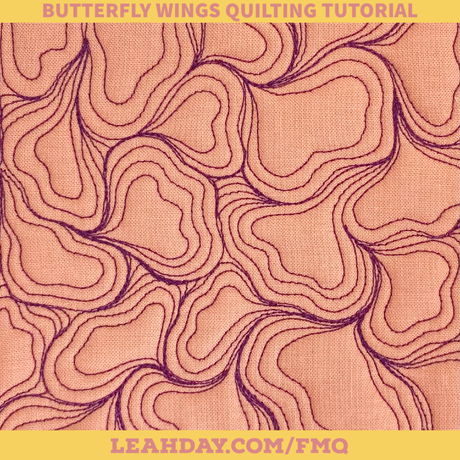
All-Over Quilting is a terrific quilting style that secures your quilts quickly so they can be used and enjoyed. Most quilters think of Stippling because it's the most popular All-Over Quilting design, but you can also use this techniques with funky designs like Butterfly Wings too!
Tools and supplies from this quilting tutorial:
Butterfly Wings is very easy to quilt because it doesn't require a set shape to begin. The wing shape is exactly what you want it to be and if you stitch it badly, no one will know!

This is another Oldie Goldie design from the Free Motion Quilting Project. Click Here to find the original tutorial for Butterfly Wings from 2010.
Where Should We Quilt Butterfly Wings in Our Quilts?
If you decide to try All-Over Quilting, you'll quilt Butterfly Wings over the entire quilt top, ignoring the piecing or applique design. On a home machine, it's best to start in the center of the quilt and work your way outward. I have an old, but still relevant tutorial on this here.
On a longarm, you can start at the top and quilt across in rows as you advance the quilt through the frame. In the video I shared a simple way to turn Butterfly Wings into a shortcut design that's easier and faster to stitch on a longarm because it eliminates all travel stitching.
Butterfly Wings can also be used as a background filler design. This means intentionally stitching it on a tiny scale to flatten out the background and let motifs, like flower shapes, pop out.
This doesn't really fit with my spring-theme, but here's a great example of Butterfly Wings stitched around a Winter Wonderland snowflake:

Butterfly Wings is a terrific design for beginning quilters to learn because you can use it for so many quilting styles. No matter which way you stitch it, you're going to boost your skills for echoing, travel stitching and hitting exact points - all great skills to master.
Would you like to try out more free motion quilting designs? Check out the Spring into Free Motion Quilting series!
Let's go quilt,
Leah Day
Check out more videos from this Spring into Free Motion Quilting Series:


