Half Square Triangles are a fun patchwork shape in quilting that, in spite of their name, is pieced using squares. A triangle shape you can create without having to actually cut a triangle shape? Sold! Let's learn how to piece it together in this quilting tutorial!
Note: Half Square Triangle is often abbreviated HST or HSTs in quilt patterns and throughout this quilting tutorial.
Jump ahead in this beginner quilting tutorial:
Table of Contents
- Half Square Triangle Cutting Formula
- Half Square Triangle Chart
- How to Make Half Square Triangles Step-by-Step
- Step 1 - Stack and Mark Your Fabric
- Step 2 - Stitch 1/4-inch from the Line
- Step 3 - Cut and Press Your HSTs
- Step 4 - Trim the HSTs to the Unfinished Unit Size
- Half Square Triangle Quilt Patterns
Half Square Triangle Cutting Formula
The first step to making your half square triangles is to cut two squares. The size of the squares can be calculated using a simple formula.
Finished Unit Size + 1 inch = Cut Size of HST Squares
The method we're discussing in this post is for 2 at a time half square triangles. There are other methods for making 4, 8, or even 16 half square triangles at a time and they all require a different formulas.
Wait? Formula? As in MATH?
Yes, formulas are really fun to use for quilting. All quilt blocks are based on simple math or geometry, so the units can typically be calculated using formulas. The key is understanding these terms:
Finished unit size - this is the size of the HST once it's pieced into a quilt block. The seam allowance (1/4-inch on all sides) is removed, so we call this the "Finished" size because it's the final shape of the unit.
Cut Size of HST Squares - this is the size you cut the two squares to make your half square triangles.
Example - Suzie would like to make 3-inch finished half square triangles. She will cut two 4-inch squares to make her HSTs.
Note - this formula cuts big. I don't like working with 1/8-inch or 1/16-inch measurements so I intentionally cut my starting squares bigger than needed. This means you will have to trim each HST down to the UNFINISHED size, which is 1/2-inch bigger than the finished size of the unit.
Half Square Triangle Chart
If you'd prefer a half square triangle chart instead, I've got you covered! Refer to the left column for the finished size of your HST unit. Look up the size of half square triangle you'd like to make, then cut the squares according to the middle column:

Don't forget to trim your pieced half square triangle units using the column on the right. If you align the diagonal line on your ruler with the diagonal seamline on the HST, you're guaranteed an accurately pieced unit that measures exactly the right size.
Would you like to learn more about accurate quilt piecing? Check out my book How to Piece Perfect Quilts to learn more about piecing with precision!
Video 1 - How to Make Half Square Triangles
If you are a visual learner, the best possible way to learn how to make half square triangles is to watch this quilting video:
We've made a lot of half square triangles over the years for various quilt alongs and fun quilt patterns. Keep reading to find links to awesome half square triangle quilt patterns so you can practice making this patchwork unit!
How to Make Half Square Triangles Step-by-Step
Half Square Triangles are often abbreviated HST in most quilt patterns. While this isn't the only way you can create them, I find it the easiest because you don't have to cut triangle shapes.

This method also maintains the grainline of the fabric so the edges of your finished half square triangles will be on grain. This is important because as you piece other shapes to your half square triangles, they will be easier to piece because all the fabrics are square with the grainline of the fabric.
Now that you know a bit about this piecing method, let's learn how to piece two half square triangles together!
Step 1 - Stack and Mark Your Fabric
Stack two squares of fabric right sides together. Mark a diagonal line from corner to corner. I like using my favorite fabric marking pens for this, but it honestly doesn't matter what pen you use because the lines will be on the wrong side of the fabric.

Step 2 - Stitch 1/4-inch from the Line
Take the stack of fabrics to your machine and stitch exactly 1/4 inch away from the marked line. Turn the stack and stitch 1/4 inch away from the other side of the marked line.

Step 3 - Cut and Press Your HSTs
Did you know you'll be making 2 half square triangles at the same time? Cut the units apart along the marked diagonal line with a pair of sharp scissors. You can also use your rotary cutter if you are making dozens of half square triangles at a time.

Press the seam allowances open first with your fingertips. Be gentle because this is a bias seam and can easily stretch out of shape. Once the seam allowances are pressed open, press the half square triangle again with a hot, dry iron.

Of course if you prefer seams pressed flat and to one side, that's just fine too. Seam pressing is a matter of preference, especially when we can now trim the unit to exactly the right shape.
Step 4 - Trim the HSTs to the Unfinished Unit Size
This is the final step, but it can be a bit tricky. First align the ruler so the 45-degree line is lined up with the diagonal seamline on the half square triangle:

Once you trim off two sides, you're ready to square your unit down to the unfinished size you need for your quilt. Remember - the unfinished size of a unit is the shape + seam allowance (1/2-inch). Refer to the right hand column on the half square triangle chart above so you trim to the right size.
Line up the edges of the half square triangle with the lines on your ruler AND line up the 45-degree line on the ruler with the diagonal seam line as well.

Trim down the remaining two sides and your half square triangles are complete and cut accurately to the proper size for your quilt!
Half Square Triangle Quilt Patterns
Now that you know how to create half square triangles very easily, here's a few half square triangle quilt patterns for you to test your new skills. Some of these are full patterns for quilts, some are single blocks in our popular quilt alongs. Enjoy!
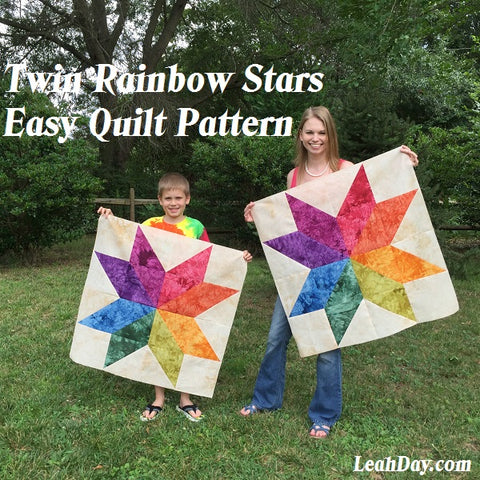
Free Pattern - Twin Rainbow Star Quilt Pattern uses super sized half square triangles to create these jumbo star shapes.
The best part of this pattern is you get to make two QUILTS at the same time! Click Here to find this free pattern.
Friendship Sampler Quilt - This is a paid pattern, and each block is sold separately so you can pick and choose the ones you like best and make any size quilt from crib to king!
Each block in the Friendship Sampler uses 5-inch squares so you can slice up your stash, or use precut 5-inch squares to make the quilt blocks. This quilt features half square triangles, quarter square triangles, hourglass squares, square in a square, and flying geese, so if you're wanting to practice piecing triangles, the Friendship Sampler is a great choice!
Building Blocks Quilt Pattern - This is another paid pattern and it comes with instructions for piecing 12 quilt blocks and 42 full sized quilting diagrams for quilting each block with unique free motion quilting designs.
While this is not a specific half square triangle quilt pattern exactly, it is one of the best skill-builders I've ever made. I used this quilt to teach my husband, Josh, how to quilt, so it's definitely beginner friendly!
And just in case you're in a hurry, here's an easy info graphic to remind you just how easy it is to piece two half square triangles at a time!


