Several months ago I had an idea to print Twisted Squares, a free motion quilting design, on fabric. I wanted to try quilting a quilt upside down with the printed backing fabric face up, and a scrappy quilt face down. It's taken me a few months to pull all the pieces together on this project, and I LOVE how it's turned out.
Learn how to quilt Rainbow Road upside down in this new quilting tutorial:
Note: You can order the Rainbow Twisted Squares design printed on many different fabrics. I ordered 2 yards of Minky fabric to create my quilt.
Now let's piece the quilt top!
Rainbow Road Free Quilt Pattern
Finished Size: 54 x 70
Click Here to download this free pattern
Piecing a Super Strip Quilt
The inspiration for Rainbow Road came from my scrap bin. I organize my scraps into a big drawer of 2 1/2-inch strips. Anytime I have leftover strips from a precut pack or leftover fabric from a project, we cut it into 2 1/2-inch strips and add it to this bin. When the bin gets too full, it's time to make a new quilt!
I had a large quantity of strips in every color of the rainbow and since I love making rainbow quilts, it seemed like the perfect excuse to design another rainbow quilt top.
I wanted to keep the design simple and fast to piece so I started by piecing all the strips together end to end. Then I cut the strips wider than the Twisted Squares backing fabric and began piecing them together.
Of course you could make the quilt even more interesting by mixing up the rows of colors. I love the big blocks of each color personally because I can see scraps from multiple quilts I've created over the years in each section.
Preparing the Quilt for Quilting
One extra step I took to prepare the Rainbow Road / Twisted Square quilt for quilting was to stitch along the pieced edges of the Rainbow Road quilt 1/4-inch from the edges. This helped stabilize the edges of the quilt that were pieced from dozens of 2 1/2-inch strips.
It also made the quilt much easier to pin to the longarm frame. I didn't have to worry about the strips pulling apart on the edges thanks to this bit of stitching securing the sides of the quilt top.
Another tip that will make this quilt easier to quilt is stabilizing the Minky fabric first. I press French Fuse to the wrong side of the Minky fabric using a pressing cloth. Minky is a polyester knit fabric and will stretch usually in one direction, sometimes in both directions.
By pressing French Fuse to the wrong side, you'll limit the stretch in this fabric and make it much easier to handle. The best thing is this interfacing is so lightweight, you won't be able to tell it's inside your quilt when it's finished.

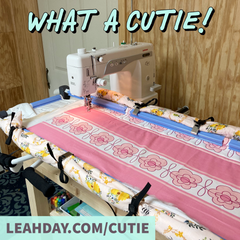
To baste the quilt, I used the Grace Qnique longarm and water soluble thread in both the bobbin and top of the machine. I installed the Rainbow Road quilt first, then spread out Hobbs Heriloom Wool batting on top, then finished the quilt sandwich with the Twisted Squares Minky Fabric.
I stitched the layers together using water soluble thread and a wide stitch length set on the longarm. You can learn how to baste a quilt on a longarm frame like this in the Basting Basics Workshop.
If you don't have a quilting frame, that's okay! Tape the Rainbow Road quilt top right side down on a table, then top it with your batting right side up, then the Twisted Squares fabric right side up.
Quilting in Reverse or Upside Down
I'm still trying to figure out how to describe this quilting process! Technically the Twisted Squares fabric is the backing, but I pieced the Rainbow Road quilt top bigger than the minky fabric. So in a way, the Rainbow Road quilt is the pieced back and the Twisted Squares fabric is a wholecloth quilt top.
Okay, that's making my brain hurt!

The Rainbow Road quilt is going to end up on the bottom or back as the quilt is being quilted. Because you have less control over what that side of the quilt looks like, make sure to clean and oil your machine before you begin quilting.
You don't want a glob of lint getting pulled out of the bobbin area and ending up on the Rainbow Road side of the quilt.
Quilting Twisted Squares on a Home Machine
I've designed the Twisted Squares fabric so you're quilting the squares on a large scale. This will ensure the quilt finishes nice and soft and super cuddly. The downside is it can feel a little slow and challenging to quilt on your home machine.

I quilted the design with free motion quilting, but you could also use your walking foot. You will end up needing to rotate the quilt even more than you saw me shifting it in the video and that will be a pain in the center of the quilt at least.
You can also use ruler foot quilting too. This might feel easier to manage because the ruler will help guide the straight lines and you won't have to shift the quilt so much to change directions.
Just in case you'd like to see how this design is quilted free hand (without any marks to guide you) check out this quilting tutorial that started it all:
To reduce thread breaks, make sure to follow the path I used when quilting on the longarm: quilt from the center of one block, then travel stitch over to the next square and quilt from the outside to the inside. Then you can break thread and move on to the next pair of blocks.

When quilting on a home machine it's important to start in the center of the quilt and work your way outward. This allows any excess fabric to move outward towards the edges of your quilt. It also means that every square you quilt should feel easier than the last. If you quilt the center blocks first, they will be the hardest and everything will get easier from there.
Quilting Twisted Squares on a Longarm
I know for a fact that I couldn't quilt this design as nicely or with as much control with the Slice Quilting Ruler. I just don't have the same level of control in moving the longarm on wheels yet and would have made a real mess of my quilt if I'd tried to quilt this design free hand.

I always keep the ruler base on my Grace Qnique machine and also attached the ruler foot. This is a foot with a thicker base which gives you a great edge to line up with the side of the ruler. I lined up the edge of the ruler 1/4-inch from the line I wanted to quilt.
Yep, you just have to eyeball this and sometimes I was off a bit. No big deal! The great thing about quilting with Minky fabric is a lot of your quilting mistakes get hidden in the fluffy surface. Of course, those wobbly lines did show on the right side of the quilt. No getting around it - this is a double sided quilt!

When quilting on the longarm frame, you quilt very differently from a home sewing machine. After I pinned the quilt in place, I quilted all the blocks in a row from the top edge down. Luckily I found I could quilt one entire row of the Twisted Squares design within the quilting frame.
If I was quilting on a smaller machine or on a smaller frame, I'd have to cut the design in half and stitch some of the lines, then advance the quilt to stitch the rest of the lines.
This isn't an issue on a bigger machine or quilting frame because the more space you have open, the more space you can quilt. Just keep this in mind and be sure to measure your quilting frame to see the maximum block size you can quilt on your machine. You'll need at least 9 inches of space to quilt using this Twisted Squares fabric as a guide.
Super Soft, Double Sided Finish
I really wasn't sure if this idea would work or how it would look on the Rainbow Road side when the quilt was finished. I finished the quilt, trimmed the edges flush with the edges of the printed fabric, and bound the edges of the quilt with solid red binding.
Then I threw the quilt in the washing machine to wash out all the water soluble basting thread. After a quick buzz in the dryer it came out looking gorgeous! It's soft and fluffy, and so bright and cheerful it makes me grin every time I see it!

Both sides of the quilt turned out great! The Twisted Squares side is slightly puffier, probably thanks to the Minky fabric. The different quilting designs I used in each purple square really stand out nicely with that extra puff.

On the "right" side of the quilt with Rainbow Road, the quilting design works perfectly. It forms an All-Over quilting texture over the scrappy color bars that makes the quilt far more interesting.
Yes, some of my quilting mistakes do show up. It's impossible to travel stitch 100% perfectly from the opposite side of the quilt. Yes, some lines are wobbly, and I overlapped my squares in a few places by accident.

But these issues are only apparent when I really look for them. Yep, you're going to see issues when your face is 6 inches from the quilt surface! When you step back, the Twisted Squares quilting design adds a beautiful texture to the scrappy Rainbow Road quilt.
I just see pretty colors and nice texture and the perfect quilt to cuddle with on the couch.
Where Will This Technique Work Best?
Now that I've made one quilt this way, I definitely plan to make more! As I said in the quilting tutorial, this isn't the best idea for quilting a quilt with a definite design or quilt blocks you've taken a lot of time and effort to piece.
This creates an All-Over Quilting design and no matter how you stitch it, I always think that style looks best on scrappy quilts with no obvious design. The Hokey Pokey Crazy Quilt, Disappearing Nine Patch, and Sixty Slice Quilt would all be good choices for this quilting method.
Using the Twisted Squares fabric to guide your quilting will add nice texture to the quilt, get the layers stitched together securely, and help you finish the project quickly so the quilt can be used and enjoyed.
More Fabric Options for Twisted Squares
Yes, I'm already working on more colors and quilting ideas using the Twisted Squares fabric. If you have suggestions please contact us and I'll happily create this fabric in the colors you like best!

