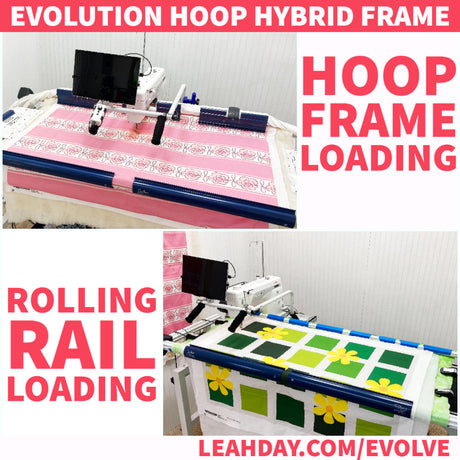
Yes, my longarm frame loading methods have changed! You can find my original frame loading tutorial here to compare the difference. I have made a lot of adjustments to my frame over the years, adding an Idler Rail, Red Snappers, and Quilt Clips to the mix. Check out this video to see how I load my frame now (Spring 2022):
Check out the tools and supplies mentioned in this video:
Yes, the links above are a bit different from what is mentioned in the video. The Grace Company is continually improving our quilting frames and longarm machines, which means we occasionally discontinue older equipment.
The products linked above are the most similar to the quilting equipment in my video, and I plan to upgrade my older Continuum frame to the Evolution Elite very soon.
How My Quilting Frame and Longarm Have Evolved
I first set up my Continuum Frame in August 2018 and built it at 8 feet long with a Qnique 14+ longarm machine. In 2019, I upgraded to a Qnique 21 longarm machine and expanded this frame to 12 feet.
After my house flooded in 2020, I used that renovation opportunity to change the walls of my longarm quilting room so I had space to expand again and now have a 12 foot frame.
As new Qnique longarm machines are released, I also like to change machines, so I'm now quilting on the Qnique 21X Elite Longarm Machine.
Upgrades to My Rolling Rail Quilting Frame
When I changed to a larger longarm machine, I had space for an Idler Rail.
This rail reduced my quilting space a little bit, but it was worth it – I never have to adjust the height of the back rail because the bulk of the quilt rolls up higher and no longer rubs against the bed of the machine.
I also began using Red Snappers a few years ago and these longarm leader cloth clamps save me at least 40 minutes per load. No more pinning, no more stabbing myself and bleeding on my quilt. I snap the backing in place and I’m ready to start quilting in 10 minutes.

But adding all of these different accessories has changed my loading process. Click Here to watch one of my very first videos on this frame and how I used to load it to compare!
How Leader Cloth works on a Rolling Rail Frame
One of the #1 questions I receive via email is about installing Leader Cloth. This seems to give a lot of quilters trouble because the instructions can seem a bit contradictory.
Here’s my advice for leader cloth – attach it the way that works best for you.
If you’re pinning to your leaders, you need to be able to see the small dotted line printed on the edge. You need to be able to hold your backing fabric in line with the edge of the leader cloth and then pin along that line.
This may mean the fabric has the printed side facing up, or facing down. There is no “right” or “wrong” method when it comes to your leader cloth. You just need to be able to use them to attach your backing fabric to the frame.
I have another video on how to attach leader cloth to a Continuum Frame. This is the same for a Continuum II frame too, and it’s the method that worked best for me – before I attached my Idler Rail.
How I Load My Rolling Rail Quilting Frame Now
Keep in mind, this loading method is very specific to how I’ve changed my frame as listed above.
I now use the medium length leader cloth on my top, back rail. The longest leader cloth is attached to the bottom, front rail.
I have removed all leader cloth and the Velcro from the top, front rail.
Why?
Simply put, this is what worked best for me. I like using Red Snappers to clamp the backing fabric to the leader cloth, but I also like using Quilt Clips to clamp the top, front rail of my frame.
The combination of the snappers and Quilt Clips on the top, front rail just didn’t work. The Quilt Clips didn’t have enough room and the snappers would often get pulled at an awkward angle when I tried to clamp the quilt.
Because I have extra snapper tubing and clamps, I now use them on the sides of the quilt to pull the sides of the quilt outward evenly as well.

So all of these things are very specific to my quilting setup, but showcase just how you might need to modify your frame or accessories to work best for you. The key is to keep an open mind, don’t get hung up on the “right” or “wrong” way to do something, but to instead keep experimenting and trying new things until you find what works best for you.
Let’s go quilt,
Leah Day


5 comments
I love that the camera in your videos is close enough that you can easily see exactly how each part goes on. Thank you for your great videos.
JoAnn – Please keep in mind, this method is the way I load when using both an Idler Rail and Red Snappers. It sounds like you are missing the top, front rail completely. The backing fabric goes OVER the top front rail, then attaches to the leader on the bottom front rail.
Hi Susan – Yes, you have it right.
I think I understand your “new” method for leader cloths. To check: is your backing now “snappered” to the bottom rail with the wide leader cloth? So this means it comes up & over the front of your “unvelcroed” top rail, underneath the floating batting & top?
Thanks for clarification!
please bear with me, i must be doing something wrong. please, please show exactly how you roll up the backing doing it this new way. you skipped that part in the video. when i try the new way my needle plate is higher than the fabric when rolled up. i have the continuum 2 frame and the lower rail is too far back for it to work this way. please please help!