It's time to load a new quilt on my longarm quilting frame! Learn how I load quilts on my rolling rail style quilting frame in this quilting tutorial. This is the method I used for loading my quilts when I first began longarm quilting. Find an updated Frame Loading Tutorial Here.
Quick links to tools and supplies from this quilting tutorial:
How to Load a Quilt on a Longarm Quilting Frame
Before I owned a longarm frame, this loading step was always a mystery to me. How do you get all the layers evenly spread out? How does it work and how do you avoid puckers and pleats that are so common with traditional basting?
The first thing to understand is loading a quilt on a longarm frame is much better and easier than traditional quilt basting. As soon as I realized how quick and easy this could be, it immediately became my favorite way to prepare a quilt for quilting.
The key to loading a quilt on a longarm frame is understanding the grainline of fabric and how to find the midpoints of your quilt top, batting, and backing. This is really simple - if you rip your fabric, the tear will always run along the grainline of the fabric.
To find the midpoint, simply fold the fabric in half and crease in the center. Then line up that spot with the center point of your leader cloth and pin from there.
Pinning to Leader Cloth the Right Way
I know I'm a little neurotic when it comes to pinning on my leader cloth! I always pin left handed so the pointy end goes to the right and I always pin from the center to the outer edges. I've found doing these two things really reduces the chances I stuck with pins which is NO fun!
Pinning the backing is really the most time consuming part of the process. Take your time with it so the backing fabric isn't stretched or skewed out of shape. Once it's pinned, it's time to roll.
As you can see in the video, I spend a bit of time smoothing out the fabric and removing wrinkles as the backing fabric rolls up onto the top rail. This ensures the ripped sides of the backing fabric stay in perfect alignment on the rail and the backing is square and straight.
Keep in mind, I never, ever had this ability to keep my backing and quilt top straight and square when basting in a traditional way - taping and pinning to a table. I do think this helps to reduce weird distortion and pleats and puckers that can so easily crop up in quilts quilted on a home machine.
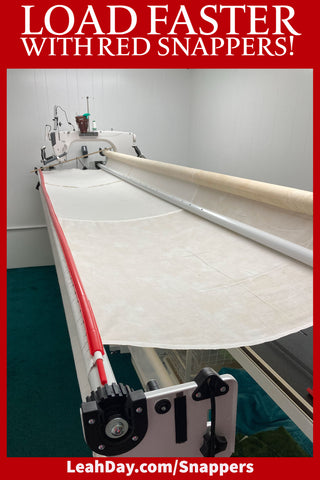
Update - I now use Red Snappers to attach my backing fabric to the frame in minutes! Click Here to find a new tutorial on Red Snappers!
Adding the Batting and Quilt Top to the Frame
Once I pin the backing fabric, everything else is stitched and clamped in place. I spread out the batting and smooth it across the frame, then tuck it between the second and third rails.
Using the channel lock on the machine carriage, I lock the machine so it stitches a straight line down the length of the frame. This secures the top edge of the batting in place and it also provides a perfectly straight line for the quilt top to be lined up with.

I place the quilt top over the batting and smooth it out, then just like the batting, I tuck it between the second and third rails.
You can pin the quilt top to the third rail if you want to, but I find this takes extra time and it's not really necessary. I use these Quilt Clips to lock the quilt top and batting securely to the second rail and add a bit of tension to the area I'm quilting.
That's it! Loading a quilt on a longarm frame isn't time consuming or difficult. I can typically load a quilt in about 15 minutes - a much, much faster process than basting a quilt on a table. The best part is I can do this standing up, which feels much better for my body too.
I hope you enjoyed this quilting tutorial! Be looking for our next tutorial on how to use the Slice Quilting Ruler on this quilt coming on Friday!
Don't forget to check out the tools and supplies I used in this quilting tutorial:
Let's go quilt,
Leah Day


31 comments
Hi Margaret – No, this method for loading is for a different style of frame. You will need to follow my video on loading your hoop frame, which you can find here – https://leahday.com/FMQStart
I have a Grace hoop frame. Can i follow that method?
I do have the Qnique 15 R, but i have a Grace Next Generation frame that someone gave me, will this same method work using this frame,, i have never used a frame and don’t know anything about it. And can’t find any tutorial on how to use this frame , I do know that Grace doesn’t make this frame anymore. Please help feeling lost .
Great Question Margaret! I now quilt across the front rail with a basting stitch, then up both sides. Yes, I break thread once while doing this so the quilt is secured to the front and sides before advancing it and basting the next section. My method has changed a good bit from this video and I will be sharing an update soon.
Hi Noshi – Yes! I personally prefer Cruise mode because it keeps the needle bouncing, but Precise is great for certain situations too. Just check out https://leahday.com/frame to find all my videos on longarm quilting.
Hello Leah
I also have a long arm like yours. Do you have any tube tutorials on tips for using different
functions like Precision and Cruise etc. Please advise.
I enjoy you videos.
leah, do you stitch down the sides of the quilt top before you start to quilt or do you just attach the side clips? I have been stitching across the quilt top and sides on the first row but then when I end up I can only stitch down one side of the quilt unless i cut my threads and move across. I also use the blue clips and they are wonderful. Thanks.
Hello,
I recently bought a Qnique 15 r on a continuum frame. I am having trouble with the machine distorting my quilt top while quilting. For example if I move from the left to the right my squares will be pulled to the right and I lose my straight lines. Any ideas on how to solve this issue? Thank you in advance!
Hi Cathy – Great questions! I ended up buying bigger leader cloth when I expanded my frame to 10 feet. I just liked the idea of it being all one piece. If you want to sew it together, I would recommend butting up the ends and zigzag stitching them together. I don’t think you should stitch a seam because that would make a very bulky line through that area of the leader cloth and it will pull more tightly on the quilt as well.
As for using your Idler Rail, I’ve just attached one to my machine and you can see how I’ve loaded it here: https://freemotionproject.com/2020/01/how-to-attach-an-idler-rail-to-your-continuum-frame.html
Hi Leah, your videos inspired me to purchase the Q’Nique 21 with the 12 foot frame! I also bought an idler rail and am having trouble finding information on how this works and the leader cloth placement with the idler rail. Also, with the 2 foot extension leader piece, should I sew this to the 10 foot leaders? Thanks!
Hi Donna – Yep! You can find it here: https://leahday.com/blogs/machinequilting/troubleshoot-tension-on-a-longarm or search threading and it will pop up on the first or second page of the results.
Leah, I’m very new to my qnique 15R and frame. Do you have video on threading the sewing head?
Hi Joelle – Hmm… I have been experiencing the same thing and I think it comes from the leaders stretching out over time. The best bet is to secure the sides using bungee cords or strips of fabric pinned, then secure that to the sides of the frame somehow. I don’t think it’s a deal breaker, but you might want to try a new pack of leader cloth and see if it continues. If you think about it, the sides would get more wear and more stretch over time, so it makes sense the fabric would give out a bit, and then the sides would be puddly instead of the center.
Hi Leah; I’m new to the quilt frame world after purchasing a second-hand B-Line Quilt Frame (deal of the century as it is nearly mint and was rarely used); I don’t have a user manual to go with this frame (and have scoured the world to try and find one), so it’s through other digging that led me to your various tutorials (really great, to-the-point instructions), and specifically on how to load the layers; the problem I’ve encountered is that after squaring up my backing and pinning the top end to the take up leader, I can’t seem to get rid of the slack that develops at either the left or right side of the frame after I’ve pinned the bottom end of the backing to the leader and start rolling it up – I’ve even removed the backing and re-squared it which it didn’t need, so I know it’s completely square; watching you roll up the backing at the front of the frame, how “sponge-y” does the roll become; have you ever had this issue and was it just a matter of constantly re-rolling the front leader? p.s. I have found that the best way to avoid the pin pricks is when pinning from the center outwards, when pinning towards the right side, the pin points face to the right, and then when I go back to do towards the left side, the pin points face the left side so that this way I can smooth out the backing with my hands running from the center out in each direction without worries of pins pricking my hands (you’re right – it’s NO FUN!) …. thanks for the great information you provide ;)
Hi Deena – The backing fabric should be right side down when you load it onto the rails of your longarm.
Becky, Leah has done several videos with quilt designs on the qnique: https://leahday.com/frame
Leah, I too have a 15R machine. I would love to see you post how to do the various stitch designs like the ones you have on a regular machine. I am having trouble with designs and would love to see a demonstration of how to do the designs on a longarm.
Hi GloQuilter – I struggle with using the side clamps so I don’t typically attach them to the sides of the quilt. I have heard from a few quilters that use hardsticks to prop them up. I need to watch a video on that to understand how it works. So far I haven’t found not using the side clamps to be an issue.
Thank you for this Leah, do you put clamps at the sides of your quilt? I have the Grace Queen with a Juki 98, my dream is to have machine like yours. When I got the frame it came with side clamps which get in the way. What do you do?
Hi Joanne – The channel locks come with the Continuum Frame. If you didn’t receive the locks with your frame, please contact Grace Company for more information.
Hi Kay – I often just don’t think to use it. That’s all. You can use the baste function to secure the batting and quilt top if you want to.
I too had to get the Qnique 14+ with the Grace Frame. My machine does not have the Channel Locks attached to it. Where can I find these? Thanks ever so much for your informative tutitorials.
Thanks so much for this tutorial. I have the same machine and frame which I bought from the Grace Co after watching you use the machine on the table.
You didn’t use the basing stitch when you loaded your quilt , is there a reason for that?
Thank you Leah! Love your organizer and look forward to seeing your pattern!
Hi Kim – That’s my tool organizer! I’m working on a fun pattern so you can make that too for your longarm or sewing machine. It was a fun little project in leather, but the techniques are super easy so I think anyone could do it.
On basting the batting, the key is getting it straight over the frame before stitching it in place. You’re right – it would probably shift less if I stitched from the middle, but so far I haven’t found this to be a big deal for the finished quilt. I love how this is far less picky than basting a quilt on a table!
Hi Leah! Thanks for the great video, so helpful!!! I wondered if it would be better to baste the quilt batting and top from the middle out to the edges. I thought there might be a little less distortion. Also, you have a fancy looking contraption on your thread holder that looks like a place for scissors, etc. I woul love to know more about that! I will definitely be watching more of your videos! Thanks again! 😊
Deena – The backing fabric needs to be wrong side up so the raw edges end up to the inside of the quilt.
Thank you so much for sharing Cindy! I’ve been tempted to try the velcro method, but I don’t like the idea of having to sew the velcro to the edge of the backing. I know I’m just being lazy, but the idea of taking it and sitting down to stitch on it just seems like a lot of extra trouble. I will give it a try though and see how it goes!
Leah, I also just recently made the switch to a longarm after having logged years into hand quilting and then on my home machine. I ALSO disliked the basting process, so that was a big deciding factor for the switch-over. I watched TONS of videos about the loading process prior to getting my setup (also a Continuum frame, but a different brand machine). After watching your video I wanted to share a technique with you. It involved making a set of canvas leaders (because I didn’t want to mess up the ones I got with my frame, in case it didn’t work out),adding velcro loop to the edges, just like the ones that came with our Grace frame. Before loading the quilt onto the frame, you actually sew the backing to the non-velcro edge of the two new leaders, matching your centers and using your home machine, #5 stitch and water soluble thread (because it’s strong but rips off very easily). This takes WAY less time than pinning and…NO PIN PRICKS…Then you simply match up the centers of the leaders to the center of your rails and away you go! The sweet thing about this process is that if you are in the middle of a quilt and need to pop another one on the frame, you simply unroll, undo the velcro and add your next quilt. You can make your leaders in various widths as well. I guess this is pretty similar to the zipper process, but faster and less expensive. When your quilt is completed, you just give the backing/leader sewn edge a tug and rip out those stiches. Sharon Schamber has a video that might better explain this process, however, she uses the “new” leaders as secondary, adding them onto her existing leaders. Personally, I think this adds too much bulk. Let me know what you think. I will continue this new longarm quilting journey along side of you, my quilting friend!
Thank you so much, Leah! I have learned so vey much from you in your tutorials in the 4 years that I have been free-motion quilting on my domestic machine! I never thought I would ever want to learn long arming! But my desire for bigger, longer swirls & feathers has me re-thinking & I have signed-up for a long-arm class next week @ a local shop where I can rent time. So excited & this is so timely for me! I have always loved your positive countenance & encouraging style. This video maintains your wonderful teaching style that I so appreciate!
is your backing material facing the face of the material to the floor or is it facing up to the ceiling?