Last week I finished up quilting the Double Stripe Diamond quilt that had been on the longarm for several months. It feels so good to have that quilt finished and the frame free for a new project. I decided to challenge myself to quilt a charity quilt less than 1 hour. See how it worked in this new quilting tutorial:
Shop for a longarm machine, quilting frame, or accessories to make longarm quilting easier:
Charity Farm Quilt Goals
I picked up this charity quilt kit from my local quilt guild. I pieced the top together in a day, and I've been needing to quilt it for the last few months.
I knew I wanted to quilt it securely with a design that wouldn't take too much time to complete. I also wanted to work on my free hand quilting skills on the longarm. Baby quilts and charity quilts are great projects for building new skills and practicing new techniques.
Planning a Super Fast Quilting Design
To be honest I really didn't know how well this design was going to go, or how fast. One very important thing – I made sure to keep the insert from my batting package which included the recommended amount of quilting for that polyester batting.
That piece of paper told me I need to quilt so the lines were no further then 3 1/2 inches apart. If the lines were spaced more than this, the batting might shift in the middle of the quilt and become weird and lumpy.
So I needed to quilt lines at least 3 inches apart to stabilize the batting. I also wanted to quilt a very simple design over the entire surface. This is called All Over Style Quilting because I'm not paying attention to any of the pieced designs or shapes.
This is the fastest way to quilt a quilt, but it pays the least attention to the piecing design. I know I had a little struggle as I quilted over the farm panel. There was a piece of me that really felt bothered by stitching green thread over the sky area.
But as I said in the video, it's good to push your edge, and your opinion of what looks good on your quilt. If stitching over the farm drives you crazy, that's something new to learn about your quilting preferences.
Personally, after I covered the quilt with the gently curving lines, I didn't mind that stitching at all.
Practice Quilting Ideas in the Batting Area
When I was getting started with this quilt I had a rough idea in my head that I wanted to quilt Matrix, a wiggly grid design over the quilt surface. But I didn't want to have to unpin the quilt to the frame to stitch two sets of horizontal curving lines.
I ended up testing my design idea in the batting area and found a great solution. Definitely use the exposed batting areas on the edges of your quilt to play. You can put down scraps of fabric if you want to see a good example of what your quilting design will look like.
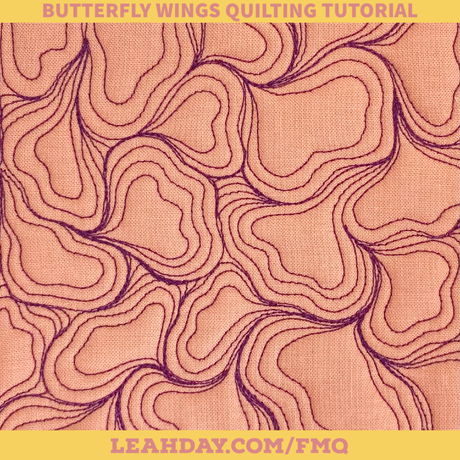
I ultimately found the wobble bobble design worked great. I first stitched through the frame with gently curving lines, then stitched back over the area with intense vertical wiggly “U” shapes or Wobbles as I called them in this video.
It ended up being much faster to quilt than I expected. It only took 45 minutes to cover the entire surface of this 40-inch quilt.
It felt great to go from start to finish on this project in less than an hour and to ultimately leave the frame empty once more. What do you think I should quilt next? Check out our collection of free quilt patterns and suggest the next pattern for me to quilt on the longarm.
Don't forget to check out the other Frame Quilting Friday videos right here.
Let's go quilt,
Leah Day

10 comments
I just started using my quiche 15r and finally not scared of it!im 76yrs old and can’t hand quilt any more I have done two practice quilts and really enjoy it ,but need lots of practice! Love your tutorials!
Hi Leah,
The quilting turned out great! First thing I thought of when I saw it is Spider Man! LOL! The quilting looks like Spider Man lines. I bet if you showed that to any little boy, they’d think the same thing. Win~win. Tractors AND Spider Man in one cool quilt! :)
I’d love to see more videos on long arm quilting. I like how you showed lots & lots of it and not just tiny snips. We can learn a lot from just watching. Thank you.
Hi Carolyn – Keep trying! All forms of quilting can be frustrating, but the more you do it, the better you will get.
I’m really frustrated with the ruler quilting. What do u suggest?
Great question Kay! I’m planning to add a simple starter kit with them soon so if you’re in a hurry, yes, order them from Grace Company.
I am so glad to see that quilting doesn’t have to be fancy. I have been quilting quite a few charity quilts in the last year or so. I have one ready to quilt, but I have been busy with other things. I usually do straight line with my Singer 66 treadle, since I can’t drop the feed dogs, but I can let up on the presser foot pressure. I use my daughter’s Bernina 950 with a darning foot and feed dogs down for curvy designs. I just got quilting and microtex needles to try in the treadle. I haven’t found them for the 950 which takes a different needle.
Are the quilt clips on your site or do I need to order them from Grace co?
Thank you Joy! I’m so glad you enjoyed this video!
That’s a great question Susan – no I don’t usually use the side clamps because they usually bang against my ruler plate and hang up the machine. It’s really just a personal preference, but they tend to get in my way more than help.
Looks like a great, fast way for a beginner mid arm quilter to do some charity quilting. I noticed that you didn’t have “side bungee clamps”. Do you always quilt without them? Thanks, and keep the teaching coming.
What a great idea! I am really enjoying sharing the learning process with you. I appreciate that you share that you are just learning too. Thanks!