I love wearing thick, fluffy socks, but unfortunately most of them last only last one season because I walk so hard on my heels. I'm sick of throwing away perfectly good socks that are only damaged in one small spot. Turns out, fixing the holes in your socks, or any garment, isn't that hard and it even has a special name: darning.
Learn how to darn your socks to in this new sewing tutorial:
Note: the darning foot listed above is compatible with high and low shank machines. Bernina machines should use the #24 Open Toe Darning Foot.
Some supplies you will need:
- Hoop to secure your sock or garment - This will flatten out the area you're repairing and make it easier to layer a second piece of fabric on top or underneath.

I tried the little 2-inch darning hoop that came with my sewing machine and that worked great for darning smaller holes. But since most sewing machines don't come with that attachment I looked around for other alternatives.
You can use a 4-inch wooden embroidery hoop, but it's going to be really hard to hoop the toes of your socks without distorting the garment.
 The best option I found was to use a widemouth canning jar ring and a 5 inch pipe fastener from the hardware store. This made for the perfect sized hoop with tall sides that made pulling the sock down much easier.
- Sewing Needles - I used my favorite Schmetz Universal 80/12 needles for sock darning.
- Scrap of matching fabric - You'll need a piece of fabric bigger than the hole you're repairing and it should have a similar stretch to the garment you're repairing. If I was patching a woven cotton shirt, I'd use a woven cotton fabric in a similar color.
I used a jersey knit to patch the holes in my socks and that worked great. The colors mismatched so my patches stood out, but I think this makes my socks more interesting! If you wanted the mend to blend in perfectly, use a similar color fabric and thread to your garment and it will not show up a bit.
- Darning Foot - This is a special foot designed to hover over your fabric. This allows you to move the hoop and your garment in all directions so you can stitch around the holes in your socks from any angle.
Yes, you really do need a darning foot to darn on your sewing machine. Other sewing machine foot will not work because they are designed to press down hard on the fabric and squash it against the feed dogs - those little teeth under the foot. More on feed dogs in a bit...
Hooping Your Socks for Darning
I don't think it matters whether the sock is inside out or right side up. I repaired two sets of my son's socks and he liked the one with the smaller mend that was stitched with the patch to the inside. But that's just the opinion of one tween-aged boy.
I found it easy to flip things around so pretty much every darn I do is stitched on a different side. Sometimes I insert the hoop inside the sock, then stitch from the wrong side with the patch on the right side. Sometimes I turn the sock inside out, insert the hoop and stitch on the right side with the patch on the wrong side.

When I had a really big hole, I hooped the sock AND a big piece of fabric to patch it. That made it much easier because the patch couldn't slip and wiggle out from under the hole.
I think this is going to be something to play with and experiment on your own. If you want a completely invisible mend, the best bet will likely be to stitch from the right side with the patch on the wrong side of the garment.
Sewing Machine Settings for Sock Darning
The first step to darning your socks is to attach your handy dandy darning foot to your machine. Like I said before, darning feet are designed to hover over your fabric so you can move the hoop in all directions.
Why do you need to stitch in all directions? Why isn't forward and back good enough?

It could work, but that would be really hard, slow, and get really tedious. You'll need to stitch over and over and around and around to bind the hole in your sock to the patch of fabric you're adding.
Think of the thread you're stitching here as the glue that's holding the fabrics together. One line of glue / stitching will not work here! Your garment had a hole in it for a reason and it will fall apart all over again if the patch and the sock aren't locked together permanently like conjoined twins.
Now let's talk about the feed dogs...
These are the little teeth on your sewing machine that feed fabric underneath your presser foot. It's their job to grip and move fabric and the amount they move is controlled by your stitch length dial.
Raise your stitch length up to a high setting like 5.0 mm and your feed dogs are going to work double time to pull your fabric through the machine. Lower the stitch length, and they will barely move.
Drop your stitch length to the lowest setting or 0 if your machine allows it, and the feed dogs will just bounce up and down. That's what you want for darning.

What about dropping the feed dogs?
Yes, you can drop your feed dogs if you really want to. Some machines have a special setting, lever, or button to make this easy. Some machines don't have this capability at all.
Dropping the feed dogs will disengage them completely and they will usually sink down into the base of the machine below the needle plate. Personally I've found this to be a double-edged sword.
While it's great to not have any resistence to the back of my garment, I find my sewing machine tends to break thread more often and stitches with weird tension when the feed dogs are down.
For this reason, I leave the feed dogs alone and just set the stitch length to 0. Easy peasy, sock darning squeezy!
I also cover the sewing machine bed with a Free motion glider. This is a slippery sheet that makes the hoop easier to slide around and it also covers up the feed dogs too.

&*$%!!! Why Isn't It Moving?!
It's important to understand when your machine is set up for darning, it will not be doing any work for you. When you press on your foot pedal, the needle will bounce up and down, but the hoop and your sock will not move at all.
The combination of the hovering darning foot and the stitch length set to 0 means there is nothing really touching your fabric so it's not going to move without your assistance.
You have to move the hoop around in circles, zigzags, great loops, whatever feels right to you, while also pressing on the foot pedal so the needle bounces up and down.
The first time you do this, you'll likely make some really big stitches. That's okay! Darning is wonderfully forgiving because you can just throw more thread at it because the more you stitch, the longer the garment will last.

Start with a simple zigzagging line to secure the sock to the scrap of fabric underneath. If your stitches seem very small try taking your foot off the gas a bit and slow down the speed your needle bouncing up and down. If this feels really hard, you could also try speeding up the movement of your hands.
 If you stitches seem very big, try slowing down the movement of your hands or pressing harder against the foot pedal to speed up your machine.
Notice I say OR - speed up the machine OR slow down your hands. This is a balancing ratio. If you do both things, your stitches will remain the same size. Only by changing the speed of one or the other will your stitches change.
Sock Darning and Free Motion Quilting
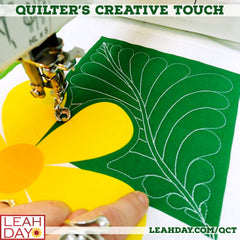
If you enjoyed darning your socks using this technique you should definitely try free motion quilting. This is a method of machine quilting uses the same darning foot and settings we've explored in this sewing tutorial.
But instead of stitching randomly in all directions to patch a hole, you can designs, motifs, even sign your name in cursive with your sewing machine.
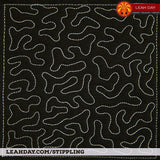
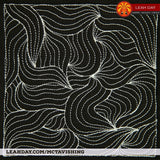
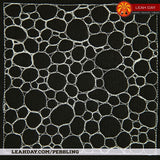
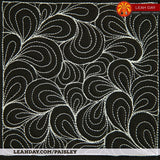
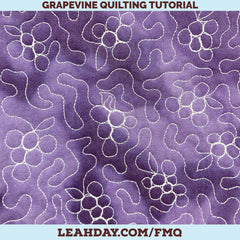
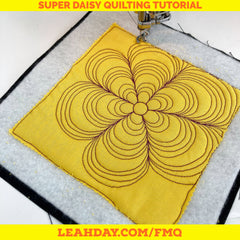
Would you like to see how this works? Click the links below to learn how to quilt the four most fundamental quilting designs:
Is this all you can do with free motion quilting? Hardly!
In 2009 I challenged myself to explore all the textures and designs I could create with free motion quilting. Check out all of the designs I've shared so far.
I've also collected the first year-worth of designs into the book 365 Free Motion Quilting Designs.
This is the largest collection of free motion quilting designs ever published and a great resource if you're interested to see what textures and designs you can stitch on fabric with your sewing machine.

