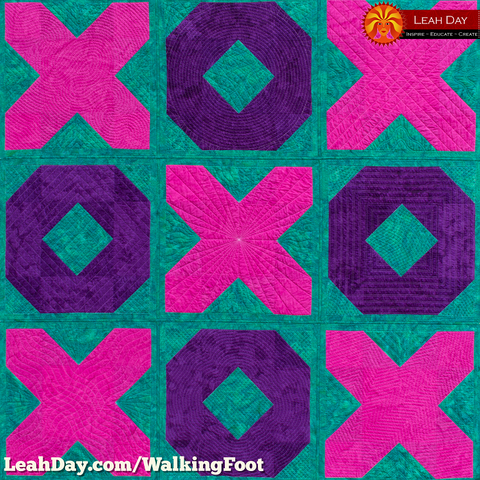
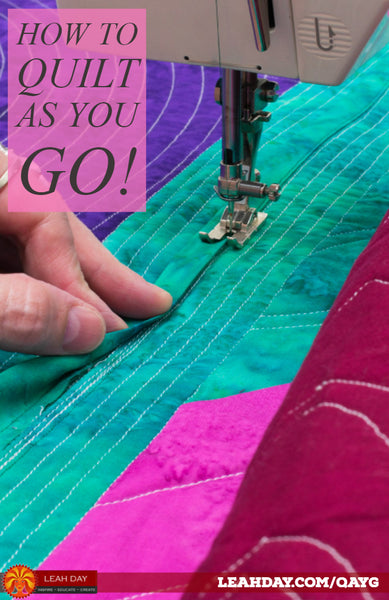
I like big blocks and I cannot lie! Big quilt blocks that is! You can quickly create a large quilt by piecing and quilting supersized quilt blocks. When you connected quilted blocks together, that's called Quilt-As-You-Go. Learn how to master this technique in this new quilting tutorial:
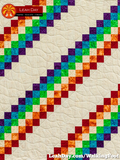
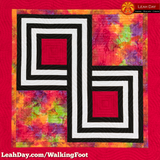
You can find the quilt pattern for the Hugs and Kisses quilt in the book Explore Walking Foot Quilting with Leah Day.
Quilt-As-You-Go Works for Any Kind of Quilting
Yes, all of the blocks you saw in this video were quilted with walking foot quilting! Isn't that cool? You can do amazing things with your walking foot and best of all, it's a very easy form of quilting to master because the foot and your sewing machine do most of the work for you.
I love the Hugs and Kisses quilt because the extra large quilt blocks were easy to quilt on my home machine, but when combined together, they created a super sized throw quilt to enjoy on the couch.
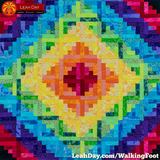
This is also the method we're using to connect the quilted blocks for the Marvelous Mosaic Quilt together:

It can be tough to quilt large quilts when your machine doesn't have a very big harp space - that's the space between the needle and the motor on the machine. Yes, I have taught a class on quilting a king on your home machine, but even I have to admit quilting a massive quilt in one big piece isn't for everyone.
So I hope you'll give this quilt-as-you-go technique a try! No matter what sized blocks you're connecting together, you'll need a strip of 1-inch wide binding for the back and 1 1/2-inch folded binding for the front of the quilt.
If you match the color of your binding to the background color of your quilt top and backing, it will blend in completely and you won't be able to tell the blocks were quilted separately.
You'll also need an accurate 1/4-inch patchwork foot. This is essential because otherwise it's going to be a real chore to put your blocks together with an accurate 1/4-inch seam allowance.
Frequently Asked Questions about Quilt-As-You-Go
I want to make my strips wider to make it look like sashing between the blocks. How do I do that?
Honestly, I'm still working out a good method for that. The benefit of the method I've taught here in the video is the edges of the quilt are butting up against one another inside the binding. This means there is no space on the quilt that doesn't have batting (the fluffy stuff in the middle of the quilt).
If you make the strips wider, you'll increase the distance between the blocks, and create a gap where there is no batting between the two layers of fabric. That's a problem because those areas will not feel the same, nor will they wear the same over time.
So let's just say that quilt-as-you-go method is still in the works!
If you want really wide sashing (like 4 inches or wider) simply cut and quilt rectangles, then connect them together using the method I've outlined in the tutorial above. I shared this technique for the Flower Festival Sampler Quilt so quilters could make the quilt bigger without making extra blocks.
How to I connect the blocks together with NO sashing?
The easiest method is to but the edges together and zigzag stitch over them. Jenedel Wilcox shared a 3 Step Quilt-As-You-Go technique with me in a podcast episode that used a 3-step zigzag to stitch the blocks together.

How well will that zigzag method wear? Test it and see! I haven't used that method personally so I can't speak for how well it will wear over time.
Another method is to stitch the quilt blocks right sides together, but then you end up with an issue of seam allowance. What do you do with the bulky seams on the back of the quilt? Clip it and let it go raggedy? Cover it with sashing? Do a pillowcase bind and cover it up?
As you can see, there are a lot of options here and so far, I haven't been much of a fan of any of them. With all techniques you just have to test, try new things, and see what works best for you!
Do you have questions about Quilt-As-You-Go? Share your thoughts in the comments below!
Let's go quilt,
Leah Day
Find the quilt pattern for the Hugs and Kisses Quilt in the book Explore Walking Foot Quilting with Leah Day, available in the following formats:
Follow along and make your own Hugs and Kisses Quilt! If you make this quilt, please contact us and send in a picture so we can add it here to this page.
Check out the other quilts included in the book Explore Walking Foot Quilting with Leah Day. All of these quilts were specifically designed to machine quilt on a home machine with a walking foot:
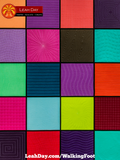
Marvelous Mosaic Quilt
Quilt-As-You-Go

Hugs and Kisses Quilt
Quilt-As-You-Go
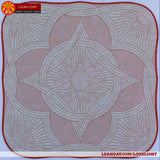
Love the Light Wholecloth Quilt
Love the Light Wholecloth Quilt
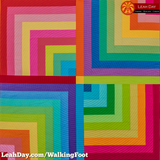
We pieced and quilted Marvelous Mosaic, Prism Path, and the Rainbow Log Cabin quilt during the 2018 Walking Foot Quilt Along. Click Here to check out all the quilting tutorials to see how all three quilts were made.
Let's go quilt,
Leah Day


33 comments
Loved watching your tutorial! Will have to try it one of these days!
I’ve successfully made a king size using your method (yeah!). This next one I am using super sized blocks for a lap size and left extra batting on the edge pieces and put on a beautiful border and quilted that too. Now I need to square up and victory lap. I wonder if using a serger would be a good /bad idea for those steps?
Thank you Leah. That was a great tutorial and I can have a go at joining QAYG blocks. Liz x
Wonderful video tutorial! Thank you for sharing! I do have a question. You did not mention how to finish off the edges of the quilt. After joining the rows together, the outside edges of the blocks won’t have any binding on them. Would I just do binding in the normal fashion for the outside edges of the quilt?
Thank you for your help!
This is THE best QAYG method I’ve ever seen, and I’ve probably watched them all in my quest to quilt my own large quilts on a domestic machine. Thank you for simplifying and demystifying the process!
Your quilt as you go instructions are the best I have found on line and showing how it is done is so helpful. I have quilted for 20 years but have never done a quilt as you go!! I have been planning to do one for 5 years and now I am going to do one now. Thank you Leah 😀😊
I’ve been practicing, and no matter how I try I’m either short a little on my top strip (it doesn’t quite cover the stitching from the bottom strip) or the stitching from the top strip is a bit to the side of my bottom strip. Do I need to use a walking foot? I’m wondering if my 1/4 isn’t as accurate because I’m using one. Or maybe I should live with the stitching showing a little on either side if the thread matches well? Thank you!
Should the binding used on the quilt as you go be cut on the bias or does it matter?
Love your quilts, I can’t wait to try and quilt one, but first I have to find out which one is easier to do. Since I am a newbie 😊. Starting out to quilt at the age of 74 😊.
Hi Luci – Yes, if your material has a right or wrong side, you would place the 1-inch back strip right side up, then the quilt block right side up, then the folded strip on top (and the strip is folded with the right side facing out). I have a written guide to this method in the Explore Walking Foot Quilting book as well.
In looking at your material, I couldn’t tell if there was a difference in the right/wrong side. I want to double-check… for the 1" back piece of sashing, it looks like the right sides (of the sashing and the backing material) are pinned/sewed together, correct?
No, I’m sorry, this tutorial is only available online. You can find these instructions also clearly written in the book Explore Walking Foot Quilting with Leah Day.
Can I get this as a download
Hi Sherry – Yes, that does sound easier. It’s hard for me to rotate my mat because of the size of the table I’m using, but yes, I do think that will be an easier method to cut your blocks square.
I’m planning on making a queen-sized sampler quilt, but the idea of quilting it on my home machine was daunting! This technique is just the answer. Thank you so much for the detailed video. I’m excited to try this!
When squaring up the blocks, would it work to turn your mat so you are working on the long side? I’m just thinking that you would still have to move the ruler up, but it may cut down on having to shift the whole block?
Thanks again…can’t wait to get started. 😊
I have strips made for a single quilt but cannot remember if i quilt stich them only to batting for a plain back or qayg then quilt stitch them for a pattern on the back. Which is correct for qayg please
Hi Vera – I’m working on several new Quilt as You Go Techniques right now. One question – will your friend mind having stitching come through the back and show on the front of the quilt? Or would she prefer to finish all the binding by hand?
Hi Leah, I was wondering if you have an answer or video showing how to qayg with no sashing on the top but with sashing on the back side. Asking for a friend of mine. Thanks
Hi Leah, I am new to quilting and 100% love your tutorials. I bought your “Explore Walking Foot Quilting” book and find it very useful; especially as this is my main quilting method for now, as free motion is still defeating me at the moment! I decided to make a quilt as you go king size quilt for my daughter in law for her 40s. Can I ask you to clarify the victory lap; how far to sew it from the trimmed edge of the block. Generally what is the rule for sewing the victory lap.
Hi Sue – Do you mean attaching the bottom rows to the main part of the quilt? When working with this technique the most important thing is starting with blocks that are trimmed and secured with a victory lap so the edges are stable and the blocks are square. Then so long as your binding is cut accurately and starched to maintain control, any sized quilt will come together perfectly. The key is the prep work so make sure to take your time on that, then stitch the rows together carefully.
Can I do a full size quilt with this technique? I’m worried about how it will work when I get toward the bottom rows.
Hi Cheryl,
No, I don’t have a video that specifically covers borders like you described. Thank you for the suggestion! I’ll try to create something along those lines soon!
Do u have a video on putting boarder corners thank you
Thank you for an excellent tutorial.
Thanks for your email
Great tutorial Leah. Thanks so much for the easy to follow and easy to understand technique.
Leah, Thank you so much for this video. I’m new to quilting, so I welcome your comments and demonstrations. I will also obtain some of your books, as I need to build up my confidence.
Once again Thank you.
Thank you for this tutorial. This is exactly what I needed at this time.
Leah, I love this video. This would also be a great way to add an extra border to a quilt if you decided to make it slightly larger.
Marja – Yes! Most definitely! Make your quilt blocks, then stitch around the outer edges with a victory lap, then cut your binding and connect the blocks together.
Will this quilt-as-you-go method work on a t-shirt quilt?
Great question Patti – the issue is shifting and bunching of the batting when you go to connect the blocks together. Really you should quilt the batting and that will sort of defeat the purpose of doing quilt-as-you-go because you’ll still have to quilt it a bit on your home machine and when you get more of the block rows put together, that will be huge.
The best thing when you have an idea is to try it so play with your sashing idea with batting and see how it works!
Why couldn’t you just make your connecting 2” connecting strip with a 1-1/2” strip of batting sewn in the middle with finished edges that you sew over block edges as you go?
I am so glad you shared quilting as you go! Can’t wait to try it! Seems so much easier than trying to quilt a king size quilt on my home machine, which I did for my daughter. My sweet husband set up sawhorses, covered with two full sheets of plywood, covered with plastic, in my living room. It worked! But I was very happy when it was done!!! I am so sorry I have never joined your quilt as you go blocks. Gotta get my courage up!!