Ultimate Ruler Quilting Guide for Beginners
Welcome to the wonderful world of ruler quilting! If you've been curious about those straight lines, perfect curves, and gorgeous geometric designs you see on quilts, you're in the right place.
Using quilting rulers to guide your design combines the control of walking foot quilting with the freedom of free motion quilting. Rulerwork is precise, flexible, and amazingly creative all at the same time. Ready to dive in? Get ready to learn:
- What ruler quilting is and the tool you must have to begin
- How to quilt with rulers on a home machine
- Longarm ruler quilting basics
- Simple ruler quilting designs to stitch on any machine
- How to troubleshoot common challenges
Note: this post includes affiliate links to Amazon that help support my business at no additional cost to you.
What is Ruler Quilting?
Ruler quilting is a method of machine quilting where you use the edge of a quilting ruler to guide the design. We press the quilting ruler or template against a ruler foot to quilt lines, curves, and specific shapes.

Here's something that might surprise you - ruler quilting is a new style of free motion quilting! A ruler foot is just a type of darning foot, which means you can quilt with rulers for a bit, set your ruler aside and wiggle around with Stippling, then pick up your ruler again and get back to quilting straight lines.
When ruler quilting, the ruler or template basically acts as a guide for the design. We press the ruler against the ruler foot and this gives us:
- More control over the design
- The ability to stitch an exact shape - like a precisely stacked feather
- Even spacing of designs and lines
- Perfect stitching in the ditch and echo ditching

The shape of the quilting rulers you're using determines the designs you'll be able to quilt. This is why collecting quilting rulers is so much fun! The more shapes and sizes you have, the more designs you can quilt.
The Ruler Foot - Your Most Important Tool
You must use a ruler foot for ruler quilting. This sturdy quilting foot is designed with a thick base and high lip so you can press the ruler against the foot to guide the design.
Without a ruler foot, it's VERY easy for the quilting ruler to slip above or below the foot and crash against your machine's needle. This could break your machine.
Click Here to find a ruler foot to fit many home machines.
Click Here for a Qnique longarm or Little Rebel ruler foot.
Most ruler feet are also designed with precise alignment in mind. Most (not all) manufacturers make ruler feet with a 1/2-inch diameter base. With your needle in the center position and a straight edge ruler like the Ditcher, you can easily quilt perfectly spaced lines 1/4-inch apart.

I love this spacing aspect of ruler quilting! This is why I design my quilting rulers with lots of extra lines etched on the back so you can easily create cool quilting designs using simple spacing to create the design.
How does ruler quilting compare to walking foot quilting? Click Here to find a video that teaches you how to quilt Crazy Curves with walking foot quilting, then you'll see how to quilt the same design with the Mini Slide and Super Slide quilting rulers.
Ruler Quilting on a Home Sewing Machine in a Table
To begin ruler quilting on your home sewing machine, attach a ruler foot and adjust the settings for free motion quilting. If you've never tried free motion quilting try this:
- Option 1 - Set your stitch length to 0.0 mm or the lowest setting your machine allows. This will minimize the movement of the feed dogs while still keeping them in engaged. I personally find this results in fewer thread breaks and tension issues.
-
Option 2 - You can also drop your feed dogs. There is usually a lever somewhere on your sewing machine, or a setting to help you disengage the feed dogs.
Please understand - dropping feed dogs is not a requirement for free motion quilting. So if you can't or don't know how to drop your feed dogs, just lower the sewing machine's stitch length instead.
You can also cover the feed dogs with an index card or a Free Motion Glider. This is a special Teflon sheet designed to reduce the friction between your sewing machine bed and the back of the quilt.
Yes, I free motion quilt with my feed dogs up on my Singer 4411, so I also ruler foot quilt with my feed dogs up. This just gives me better thread tension and stitch quality than dropping the feed dogs, but please use whatever home sewing machine settings you prefer.
Video 1- Ruler Quilting Basics on a Home Machine
Let's cover the basics of rulerwork quilting on a home sewing machine. This video demonstrates how ruler quilting works and I explain why we must use a ruler foot for this technique.
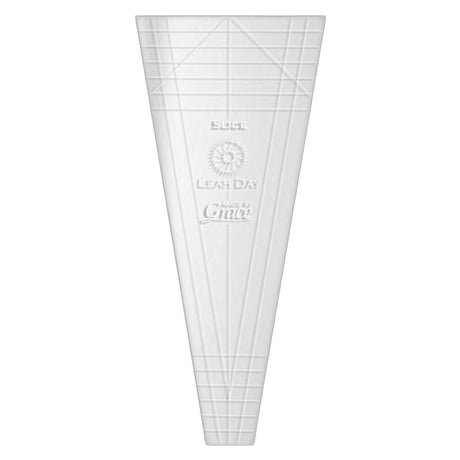
If you'd like a similar quilting ruler to the one in the video above, Click Here to check out the Slice Ruler.
The Golden Rule: Foot Position
Here's the most important tip for ruler foot quilting - never drop your needle with the foot in the up (lifted) position.
When you drop your needle to bring your bobbin thread to the quilt surface, always double and triple check that your ruler foot is in the down position. We must make sure the foot is in the down position because otherwise, the needlebar can smash against the tall base of the ruler foot.
Especially when using a low shank ruler foot and adapter on an older Bernina machine, always make sure your foot is in the down position before you drop the needle.
What is the Correct Ruler Thickness for Your Home Machine?
This is where ruler quilting gets a little complicated - there are different thicknesses of quilting rulers and they work with different home sewing machines. Check out this list to learn which thickness of ruler you'll need to use for your machine:
- Low Shank Machines - These are typically smaller home sewing machines with snap-on style feet like the Singer Heavy Duty. For machines like this, you'll use thinner 1/8-inch thick rulers.
- High Shank/Brand Specific Machines - If you have a bigger home sewing machine like a Little Rebel, Janome Horizon series, Juki-TL series, or newer Bernina machine manufactured after the 1630 you'll use the thicker 1/4-inch longarm rulers
-
Older Bernina Machines - If your Bernina is much older, getting a ruler foot is a little tricky. I found using a low shank adapter and a low shank ruler foot was the only option for my vintage Bernina machines. For these machines use thinner 1/8-inch thick rulers
Even with 1/8-inch thick rulers, you may find the ruler binding up on the back side of a low shank foot. If this happens, take extra care in the placement of your ruler on the quilt and try to avoid quilting backwards and into that angle.

Always remember - rulerwork didn't originate on home sewing machines. Longarm quilters developed ruler quilting so flexibility is the key with making this technique work on a different quilting system.
Challenges for Ruler Quilting on a Home Machine
When quilting on a home sewing machine, you will be pushing the quilt over the machine bed. The quilting ruler does add an extra thing in your hand - you'll be pushing the ruler and the quilt through the machine at the same time.
This makes it even more important to have your machine set into a dropdown sewing table or sewing cabinet. You need a flat surface to support the quilting ruler so you can smoothly push the quilt and ruler through the machine.
Support the quilt with a table big enough to hold it, or suspend it with a quilt suspension system. This helps keep the quilt on the table as you stitch. As you push the quilt and ruler through the machine, the last thing you'll want is the quilt to suddenly flop off the table and gain 15 pounds of gravity pulling against you.
To help the ruler stay in place as you quilt, attach grips to the back like True Grips. You can also improve your grip of the ruler by wearing quilting gloves.
I also attach a Ruler Knob, which is making a big difference when ruler quilting on this small Singer sewing machine. This is basically a quilting ruler handle and it's giving me a better grip on the ruler with less tension on my hand.

Please be kind to yourself as you're trying ruler quilting for the first time. Start with placemats, table runners, or individual quilt blocks. I taught ruler quilting in the Flower Festival Sampler Quilt Along and the Friendship Sampler Quilt Along.
Do you have questions about ruler quilting on a home sewing machine? Get in touch and ask for help! I update this post regularly and would love to hear your feedback.
Ruler Quilting on a Home Machine on a Frame
Thanks to The Grace Company and our affordable quilting frames, many quilters are now quilting with their home sewing machine on a quilting frame instead of a table. This changes the way ruler quilting works because now the quilt will remain stationary, clamped to the frame.
When ruler quilting on a frame, you'll press the ruler on the quilt
with one hand and steer the machine around it with the other hand.
 You'll still need a ruler foot, and you MAY need a ruler base. A ruler base is a platform attached to the machine that supports the ruler under the quilt.
Check the area around the needle plate of your sewing machine. If you have at least 6 inches from the back to front of your sewing machine, you probably have enough space to support rulers.
Yes, there are options to purchase a cut ruler base for home sewing machines, however I've had mixed results with using these because they depend on adjustable feet attached to the bottom of the acrylic to hold the ruler base in place. Unfortunately the feet didn't line up with the top plate carriage on my quilting frame - so it didn't end up working for ruler quilting.
Based on this experience, I recommend that you select a home sewing machine that either has a wide area around the needle, or choose a machine like the Little Rebel sewing machine, has compatible ruler base created to fit it.
Video 2 - How to Attach a Ruler Base to a Little Rebel Sewing Machine
See how to attach a ruler base to the Little Rebel sewing machine. This is a tight fit and requires your needle to be in a specific spot so you can slide the base in place. Once you get it in place, there's no need to remove it:
Video 3 - Ruler Quilting on a Longarm Machine
Now that you understand bit about ruler quilting on a home sewing machine, let's switch to how this works when ruler quilting on a longarm machine:
Click Here to find the Slice quilting ruler from the video above. As you can see, straight lines are the easiest thing to quilt, but you can also quilt off the corners or the blunt end of this ruler to create even more interesting designs.
Longarm Ruler Quilting Accessories
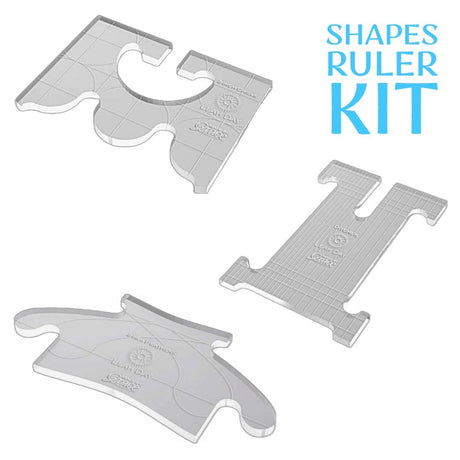
In addition to a ruler foot and quilting rulers, you'll need a ruler base to safely quilt with rulers on your longarm machine. Click Here to find all three ruler quilting tools in one kit!

The ruler base slips onto the longarm base and locks in place, creating a wide platform to support the ruler. Without this ruler base, the ruler can easily tip sideways and crash against the moving needle.
If you're quilting with a home machine on a quilting frame, you may also need a ruler base. If your machine has a locking extension bed or accessory tray, attach it and see how wide the space is. I find 5-6 inches of width is usually enough to support the ruler, but be careful and test before jumping in with both feet.
If you have a Little Rebel, Click Here to find a compatible ruler base for this machine.
Longarm Machine Settings for Ruler Quilting
When quilting with rulers on a Qnique longarm machine, you can use either stitch regulated setting. For a long time I quilted with my machine in Stitch Regulated Precise, which is a setting that is stitch regulated, but when you stop moving the longarm, the needle doesn't move.
Over time, I found the amount of pressure I was putting down on the ruler against the ruler base limited my movement. In Precise, sometimes I'd get a bit "locked up" because the needle was down and I couldn't wiggle the longarm around enough to get the needle to bounce back up.

So I switched to Stitch Regulated Cruise and this setting has the needle bouncing all the time. Even if you pause, not moving the longarm machine, the needle is still bouncing up and down. I do tend to click the machine on and off often - almost for every line of quilting stitched so I can take my time repositioning the ruler and getting it where I want it.
The stitch length is determined by the setting on your machine and I like tiny stitches, so I almost always have mine set for 16 stitches per inch, but this is entirely up to you!
Correct Ruler Thickness for Longarm Machines
Longarm machines all use the 1/4-inch thick longarm rulers. These are noticeably thicker than normal rulers or templates - around double the thickness.
Choosing Your First Quilting Rulers
Whether you're quilting with rulers on a home sewing machine in a table or a longarm machine on a frame, we all need to start with the basics. I recommend starting with simple shapes and smaller rulers.
Why smaller rulers? The bigger the ruler, the harder it is to control and keep it in place as we quilt around it. Especially on a smaller home sewing machine, you'll want to use smaller rulers that fit comfortably in the palm of your hand so you can easily push the ruler and the quilt through the machine.
Even on a longarm machine with a ruler base attached, a ruler longer than 10 inches is going to be hard to control. This is why I designed all of my rulers to be smaller - they fit better in your hand and are easier to use on any quilting system.
Now let's talk shapes: the shape of the ruler determines the designs you can create. If you watched the video above, I was able to stitch evenly spaced straight lines with the Slice quilting ruler, but also quilt Peaks and Bricks too.
Think of each ruler as an assistant that, combined with the ruler foot, allows you to quilt certain shapes perfectly. This also means that quilting rulers are a new thing to collect - every ruler opens a new world of shapes and designs for you to quilt!
Essential Starter Rulers:
- Straight Edge Ruler - Slice or Ditcher are perfect for echo ditching and straight line quilting
- Mini Slide Ruler - Great for gentle curves in smaller spaces
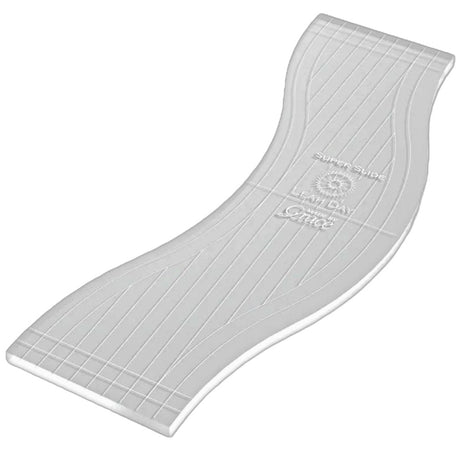
- Super Slide Ruler - Perfect for larger curves and border work
Single Shape Rulers:
- Circle Ruler - For perfect circles and scallop designs
- Feather Ruler - This ruler helps you stack perfect 2-inch feathers.
Helpful Ruler Quilting Accessories
True Grips - I like using these on the back of quilting templates to help keep them in place so they don't slip as I quilt. They add a bit of grippy texture without sticking to the quilt surface.
Machingers Gloves - I always wear these while quilting on my home sewing machines, but they seem especially handy for gripping both the quilt and the quilting ruler at the same time.
Getting Started: Your First Lines
My best advice when getting used to ruler foot quilting is to quilt slowly. Move your hands slowly and steadily, keep the ruler/template in position on the quilt and against the ruler foot, and make smooth, steady movements as you quilt.
It's good to quilt slowly because the additional ruler/template on the quilt will act as an extra grip, giving you more control over the quilt movement. It will feel very easy to shift with the help of the ruler, and very tempting to move it quickly. But that will result in big stitches, so take it slow until you can balance that extra hand speed with extra machine speed.
Practice Steps:
- Start with a small block or fat quarter sized practice sandwich
- Mark some straight lines on your quilt as guidelines
- Try quilting evenly spaced lines 1/4, 1/2, and 3/4 inches apart
- Focus on keeping the ruler aligned with the foot throughout the quilting process
Mastering Straight Lines
The key with ruler quilting is to keep your foot aligned with the edge of the ruler. There are etched lines on the back of the ruler to help you position it and space the lines accurately. Always remember to add 1/4-inch from the edge of the ruler - that's the distance between the edge of the foot to the needle.
For echo ditching in pieced blocks, line up the edge of the ruler with the ditch lines on the quilt. Because your needle is in center position in the middle of the ruler foot, it gives you exactly 1/4 inch spacing between the needle and the ditch line. As long as you keep the ruler foot sliding along the edge of the ruler, and the ruler pressed to the edge of the ditch, the line will remain straight and perfectly spaced.
Adding Curves to Your Quilting
Once you feel comfortable with straight lines, branch out with curved designs. Both the Mini Slide Ruler and Super Slide Ruler are continuous line curves, meaning if you start and stop quilting 1/4-inch from the ends of the ruler, the line will continue seamlessly to create a perfect flowing curve.
Watch: Corner to Corner Curves (Featured Video #4)
When quilting long curving lines, the most important thing is to keep the ruler straight with the seam lines of your quilt if that's the look you're going for. Line up one of the etched lines on the ruler with a seam line so you can stitch the curve continuously.
Ruler Quilting vs. Walking Foot: When to Choose What
Sometimes you'll find that walking foot quilting actually works better than ruler quilting, especially for wider spaced lines that need precise marking.
Watch: Ruler Quilting Vs Walking Foot Quilting (Featured Video #5)
Choose Ruler Quilting When:
- You want to combine straight lines with free motion quilting in the same area
- You're working with closely spaced lines (1/4" to 1/2" spacing)
- You want the flexibility to change direction without rotating the quilt
- You plan to add filler quilting like stippling between the lines
Choose Walking Foot When:
- You need widely spaced lines with precise measurements
- You're quilting long, straight lines across the entire quilt
- You want the most even stitch quality for structural quilting
- You don't mind the slower pace and need to rotate the quilt for direction changes
Longarm Ruler Quilting
Quilting with rulers on a longarm machine opens up even more possibilities, giving you space to work with larger rulers and quilt more complex designs across wider areas.
Watch: Ruler Quilting on a Longarm Machine (Featured Video #2)
Setting Up Your Longarm for Ruler Work
Just like with home machines, you need a ruler foot attachment for your longarm. This has become my favorite foot and I generally always have it on my longarm, no matter if I'm quilting free hand, with rulers, or with computerized automation. At any given time I might want to grab a ruler for stitching in the ditch or travel quilting, and having to change feet is a pain.
Positioning for Success
My biggest tip for quilting with rulers on a longarm might surprise you - I think it's easiest when you advance the quilt towards your body, away from the back rail. When you have a large longarm, it can be hard to keep a good grip on your ruler and machine when it's right up against the back bar.
The solution is to roll the quilt back across the frame so the area you are quilting is closer to your body. This way you can grip the quilting ruler and make sure it doesn't tip as you quilt your design. While it might limit the space you have to quilt in, it results in more control over the ruler, making for a more comfortable quilting experience.
Working with Thicker Rulers
Longarm machines typically require thicker rulers because the foot hops and could potentially jump on top of a thinner ruler. You'll need rulers that are specifically cut for longarm use - typically 1/4" thick instead of the 1/8" thick rulers used on home machines.
Creative Design Applications
Feather Quilting with Rulers
One of the most exciting applications of ruler quilting is creating perfect feathers. With the right ruler, you can achieve consistent, beautiful feather designs that would be extremely difficult to do freehand.
Watch: How to Quilt Feathers (Featured Video #3)
The Feather Ruler works wonderfully with straight stems, but you can also use it with shallow curves made from the Mini Slide ruler. If you use a deeper curve, like from the Super Slide ruler, the depth will be too great for the Feather Ruler - it's not impossible, but it will take more practice to quilt the feathers perfectly.
Border and Sashing Designs
Rulers are particularly useful for border work, where you need consistent designs that flow around corners and fit specific measurements. Designs like "Pyramids in the Sun" combine ruler quilting for the geometric elements with free motion quilting for organic details.
When planning border designs, take 10 minutes to plan your design before quilting, including how you'll handle the corners. Mark the corners to have that part of the design planned, then space out the remaining elements down the length of your quilt. That little bit of planning time will be well worth it as the border will fit and fill very easily.
Combining Techniques
Don't feel like you have to choose just one quilting method! Some of my favorite quilts combine ruler quilting for structural elements with free motion quilting for texture and interest. You might use rulers for the main design lines and then fill in with stippling, pebbles, or other free motion designs.
Troubleshooting Common Issues
Thread Breaks
Possible Causes:
- Incorrect tension settings
- Bent or dull needle
- Moving the quilt too quickly
- Ruler catching on the foot
Solutions:
- Use the same tension settings as your regular free motion quilting
- Replace your needle - most thread break issues relate to needle problems
- Slow down your movement speed
- Check that your ruler foot is properly attached and the ruler is positioned correctly
Foot Height Problems
Issue: The ruler foot seems too high or doesn't make proper contact with the ruler.
Solutions:
- Ensure you're using the correct ruler thickness for your machine type
- Check that you have a ruler foot, not a regular darning foot
- For machines requiring thicker rulers, make sure you're not trying to use thin home machine rulers
- Verify your foot is properly installed according to manufacturer instructions
Ruler Striking/Needle Hits
This is the big one to avoid! Ruler striking occurs when the needle hits the ruler, often breaking the needle or damaging the machine.
Prevention:
- Always ensure your foot is in the down position before dropping the needle
- Never start quilting with the ruler foot in the up position
- Keep the ruler flat against the quilt surface
- Don't let the ruler slip under or over the foot
- Move slowly and maintain control of both the quilt and ruler
Movement Issues
Problem: Difficulty controlling the quilt and ruler together, or the ruler keeps slipping.
Solutions:
- Add True Grips to the back of your rulers for better grip
- Wear quilting gloves for better control
- Start with smaller rulers until you build coordination
- Practice on smaller practice sandwiches before attempting full quilts
- Slow down - most control issues stem from trying to move too quickly
Bobbin Thread Won't Come Up:
- First check the foot is in the down position
- Check your needle - bent or dull needles cause this issue
- Verify your bobbin area is threaded properly
- Make sure you're using the correct needle type for your thread
Building Your Ruler Collection
Start simple and build your collection gradually. Here are some versatile rulers that will give you the most design options:
Essential First Rulers:
- Straight edge ruler for lines and echo quilting
- One curved ruler (Mini or Super Slide)
- Circle ruler for curves and scallops
Next Level Additions:
- Feather ruler for traditional designs
- Specialty shapes that match your quilting style
- Larger rulers as your confidence grows
Remember, a quilting ruler is only as good as the guidelines provided on the back. Those guidelines help you align the ruler so you can easily quilt the same shape repeatedly and create cool stacking designs.
Practice Makes Perfect (But Perfect Isn't the Goal!)
Here's something I've learned over the years - there's a constant push/pull with perfection in quilting. For many years I nit-picked my quilts to death and ripped out every single bad stitch. I didn't finish a lot of projects, and the stuff I did finish, I usually didn't like very much.
Now I approach quilting differently. When I quilt with rulers, yes, sometimes the ruler isn't in the right place and sometimes I get distracted and quilt something... creative... instead. But leaving those little imperfections makes the quilt feel more human, more loved.
Don't get me wrong - I still see the mistakes, but somehow leaving them in makes me happy. Your quilting will improve with practice, but don't let the pursuit of perfection stop you from finishing and enjoying your quilts.
Ready to Start Your Ruler Quilting Journey?
Ruler quilting combines the precision of measured lines with the creativity of free motion quilting. It's a technique that opens up new design possibilities while building your confidence with machine quilting.
Start with simple straight lines, work your way up to gentle curves, and before you know it, you'll be creating complex geometric designs and perfect feathers. Remember to quilt slowly as you learn, keep that foot in the down position, and most importantly - have fun with the process!
The key to success with ruler quilting is practice, but also accepting that learning is part of the joy. Every quilt teaches you something new, and every "mistake" is just another step in your quilting journey.
Additional Resources
Links to more ruler quilting videos and tutorials Ruler purchasing guide Recommended practice projects Community forums and support groups
Ready to dive deeper? Check out our comprehensive video library with step-by-step tutorials for every skill level, from your first straight line to complex feather borders.
Let's go quilt!
Leah Day