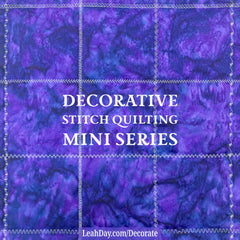
Welcome back to the Machine Quilting Party! What happens when you quilt Pinstripes, then rotate the quilt, and quilt Pinstripes again? You get Pinstripe Gridlines! This quilting design is perfect for adding a touch of elegance and formality to any quilt.
Learn how to quilt Pinstripe Gridlines in this new walking foot quilting tutorial:
Click Here to find the book Explore Walking Foot Quilting with Leah Day. Inside you'll find 30 fun walking foot quilting designs with tips on how to use them in real quilts. This book also includes the quilt pattern for Marvelous Mosaic, the quilt we're making together with these squares!
Affiliate: I also used 1/4-inch masking tape to mark the narrow lines of Pinstripe Gridlines. I found this tape on Amazon right here.
Tips for Quilting Pinstripe Gridlines with Walking Foot Quilting

The key to quilting Pinstripe Gridlines is the same for any grid style design - keep the quilt flat, evenly space your lines, and watch out for ripples, puckers, or pleats as you stitch back over the first set of lines.
When I began this walking foot quilting journey, I would always begin grid designs by quilting all the lines running in one direction, then rotate the quilt and stitch all the lines in the other direction.
These days I mix it up a bit and stitch half the lines running in one direction, then quilt half the lines running in perpendicular. This feels a little faster and I find it also helps avoid puckers and pleats that can easily form when you quilt over the first set of lines.

Just a quick reminder about my machine settings:
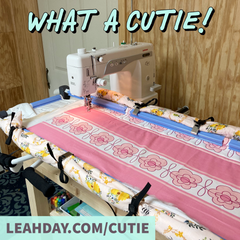
For walking foot quilting I always set the stitch length to 1.5 mm and place a Queen Supreme Slider on my sewing table to the left of the feed dogs like so:
However, for this Marvelous Mosaic Quilt, I have Minky fabric on the back which likes to grip the machine and table. When using this fabric on the back, I increase the stitch length to 2.5 mm.
What's that weird thing on top of my machine? That's a small magnetic pincushion and a cheater needle. I keep those handy for tying off and burying loose thread tails as I quilt. Click Here to check them out.
Where will Pinstripe Gridlines Work Best in Your Quilt?

Personally I think all designs can work in just about all areas of your quilt, but there's a big difference in how EASY that quilt feels to stitch. I think Pinstripe Gridlines will work great as an All-Over quilting design.
If you read the book Explore Walking Foot Quilting, you'll know an All-Over quilting design is a quilting texture you use to cover the entire quilt. This would mean quilting Pinstripe Gridlines over the entire quilt from the center to the outer edges.
If you're making a bed quilt, I'd space the lines 1 inch apart for the closer spacing, then 4 inches apart for the wider spacing. That will ensure the finished quilt feels soft and cuddly.
If you'd like to quilt this more densely, please consider just how much time it will take to quilt a big area of your quilt. Instead of covering the whole quilt, use Section Quilting to quilt smaller pieces of the quilt instead.
By quilting Pinstripe Gridlines in a smaller section, you'll still add this elegant texture to your quilts, but it won't take nearly as long to finish your project!
Would you like to learn new machine quilting designs and make a big, beautiful quilt?
That's what we're making with Marvelous Mosaic!
We're quilting all 30 designs from the book Explore Walking Foot Quilting with Leah Day and we're going to connect together the best 20 to create the Marvelous Mosaic Quilt.
Click Here to find all the walking foot quilting videos I've shared so far. We're making three quilts together from this book and you can join in the fun and follow along anytime!
Let's go quilt,
Leah Day
Find more walking foot quilting tutorials by clicking the links below:
How to Quilt Concentric Squares
How to Quilt Pinstripe Gridlines
How to Quilt Concentric Circles


